Skip to content
Open in Editor

Melee Telos

Introduction

This guide assumes 250%+ and works best at 1000%+, but these rotations still work below 250% with some tweaks. Adjust accordingly from there - below 250%, these rotations can be loosely followed but after that, you definitely want to make sure you follow them.

An average kill at 2449% enrage is worth coins 8,336,437 in uniques alone. This assumes an estimated orb price of coins 46,531,333. Advanced players can get up to 17.8 kph, earning coins 148,388,576/hr.

Notable Enrage Checkpoints and Changes past 999%

1000%: P4 one rock will fall, P5 multiple rocks will fall, immortality no longer works P5, and Telos will freedom stuns and binds with a 16 tick cooldown

2000%: "So you think you can guard?" Achievement, aka Silver Warden

2700%: Tendrils damage required caps at 30,000

3300%: The first prayer drain on P3 will smite you from full unless Telos touches the beam

4000%: Hard enrage cap; "The True Warden" Achievement, aka Gold Warden
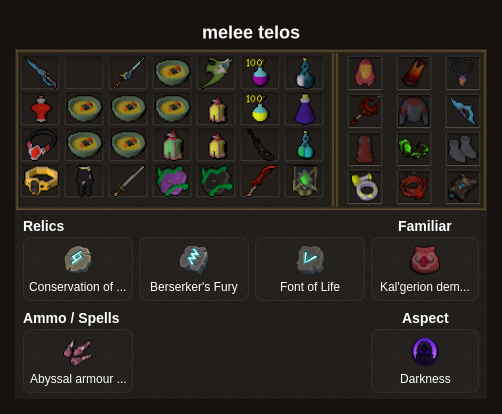
Presets and Relics

Preset Suggestions

Rotations

Phase 1

Note: these rotations depend upon proper P1 entry + Target Cycle (tc) timing; e.g. defensive → (wait 2t) → surge → defensive → tc tick. Use sample kills as a reference, or this video: https://youtu.be/wveIsE9Y0C8

devo → wait 2tsurgezerk adrenrenewal → tcjawsoftheabyss gbarge → 4tsmokecloud destroyeofspec dragonscimitargfuryoverpowerseverhydrixbakri grico

Phase 2

gbargeabyssalscourge destroy → 5taabackhandfbackhandchaosroar → (ingen) eofspec zekkil → (limitless) slaughterdismemberhavocgopoverpower (spec lengmh if <60 adren) → gfuryhydrixbakri grico

Phase 3

gbargedestroydismemberbloodtendrilshavocgopgfuryspec lengmh/overpowerpunish

Phase 4

The goal here is to phase Telos into each font before he can fire off any special attacks, so rocks are completely skipped. For help using stickybomb , refer to Sticky Bomb Guide for Phase 4/5 below.

Note: This section of the guide will demonstrate 2 different rotations for clearing P4 and P5 - one being a slightly slower but safer method, and the other being slightly faster albeit riskier. Both are perfectly viable so it just comes down to preference which one you prefer.

Drop

gbargedestroyeofspec dragonscimitargfury

Font 1

Slower

antireflectres/divertjawsoftheabyss dismemberdeciprepvestmentsofhavochood freedom → pregbarge telosdestroygfurypunish

Faster

reflectantijawsoftheabyss severdecidismembervestmentsofhavochood prep → prebarge telos → stall destroy for 1t in font → punishsever

Font 2

Slower

cadejawsoftheabyss dismemberanticlearheadeddeciseverprepvestmentsofhavochood vokegbarge telosdestroyspec lengmh

Faster

res/divertanticlearheadedchaosroaroverpower accelseverdive back to font

Font 3

Slower

reflectres/divertfreedomdevoanticlearheadedchaosroar → stalloverpower telos → rsmokecloud gfury adrenrenewalpunish

Faster

reflectdevofreedomgbargeassault adrenrenewalspec lengmhcane

Phase 5

Note: for more information on timing & moving efficiently throughout P5, read: #P5 Movement & Timing

lengmh should be equipped. Ensure disrupt and DeflectMelee are active to start the phase. Since disrupt prioritises Telos's magic attack, this prevents a KO from both Telos & the golems.

Slower

gbargedestroydive greenbeamnat vitality clickteloseofspec dragonscimitar (anticlearheaded if volcanics) → zerkcadeturtlinggbarge → 2xeofspec gmaullimitless assault + eofspec gmauloverpower redbeameofspec dragonclawpunish

Faster

gbargegflurrydive greenbeamnat → (anticlearheaded if volcanics) → cadeturtlingzerkgbarge + 2xeofspec gmaullimitless assault + eofspec gmauloverpower redbeameofspec dragonclawpunish

Note: It’s also a near necessity to wait two ticks before Dive dive greenbeam and nail the timing. If you Dive dive too early, golems can surround you when inside the beam and it can hurt far more, and if you Dive dive too late your Disruption Shield disrupt can no longer guarantee you not getting KOed at the start.

Sticky Bomb Guide for Phase 4/5

Phase 4 General Notes

⬥ Sticky bombs take 3 ticks to land when thrown, and creates a 3x3 area that will make bindable/stunnable enemies get stuck.

⬥ Phase Telos to hp cap then run into the appropriate font.

⬥ Once font is depleted click on sticky bomb and use the right click option on middle golem. Don't drop sticky yet.

‎ ‎ ‎ ‎• Throw the first sticky bomb when you get the popup message You dare defy me?

‎ ‎ ‎ ‎• Throw the second sticky bomb directly beyond the first sticky bomb when you get the popup message Telos is preparing to fire an anima bomb!

⬥ When you barge and start damaging Telos, put yourself in a direct line beyond the minions and the sticky bombs so they stay in line and run into the next sticky bomb rather than dispersing and running around the bomb.

Note: there are pre-barge and non pre-barge strategies to damage Telos between fonts. This section will have examples showing pre-barge.

Font 1 sticky bomb example:

Font 2 sticky bomb example:

Note: The player did a faster font 2 method where they went straight into the font, then ran out to the waiting spot to line up minions, and then back in. The safest way is to go directly to the wait spot and let minions stack there.

Font 3 wrap around method:

Example Kills

⬥ 2:54 (safer) https://youtu.be/LUOo5n0bXVU?si=w7uWESNBj9t8MmD1

⬥ 2:56 (riskier) https://youtu.be/-fWGCt_OjEs?si=pRqjBuEe4p08a6O4