Ranged Dragonkin Laboratory Guide
Introduction
This is an advanced guide which assumes a strong underlying knowledge of all mechanics and information presented in #ed2-basic.
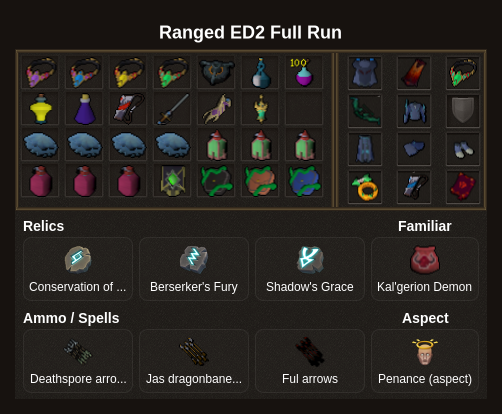
Presets and Relics
⬥ Ranged 
Rotations
⬥ This guide assumes you're on a dragon cluster task
⬥ The sections between bosses can be loosely followed, but will still require you to improvise
Section 1
 +
+  →
→  +
+  →
→  →
→ 
 →
→ 
 +
+  →
→  →
→
+ 
 →
→  → → →
→ → →  → → → → (equip
  )
)  →
→  →
→  + →
+ → 
(equip )  → → → →
 →
→  → →
→ →  → →
→ →  → →
→ →  →
→  → →
→ →
→ → → → → → → → → → →
Note: you can skip  if you don't lose time since you'll still have up for golems, which is a little faster.
Astellarn

Astellarn
+ →  +
+  →
→  →
→
Section 2
→ → → → → → → → →  + +
+ +  → → →
→ → →
→ → → → → → → → → → → → → → → →
→ → → → → → → →
→ → → → → → → → → → → →
Verak Lith
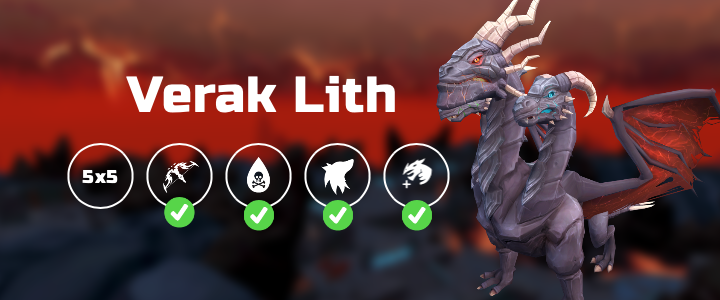
Verak Lith
+ → → + + (3t) → →  → → → →
Section 3
Chest TP to 4 → (equip ) + (x4) + → → →  + →
+ →  → (equip ) → → → →
  → → →
→ → →
→ → → → → → (target hydrix dragon) → → → → → → → →
→ → → → → → → → → → → → → →
Black Stone Dragon
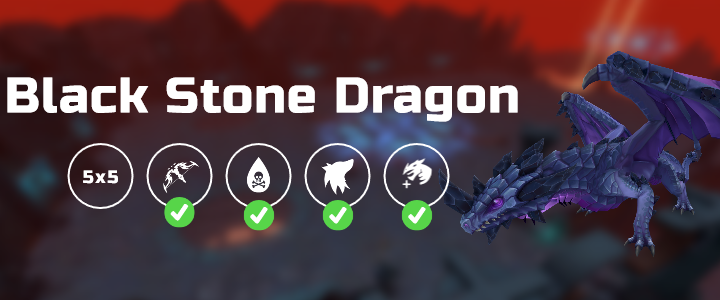
Black Stone Dragon
→ + + + → → → →
First Hand
+  + →
+ →
Second Hand
→ →
Third Hand
→ → → → → → → →
Fourth Hand
→ → → + → → → →
Black Stone Dragon
(TC BSD) +  → → + → → + (3t) → → → → →
Example Kills
⬥ ~7:20
⬥ 7:14
⬥ 6:44.2