Amascut 1000% Magic-Melee (Hybrid Base) 


Introduction
This is an advanced guide which assumes a strong underlying knowledge of all mechanics and information presented in #Amascut NM Mechanics and #Amascut 2000 Mechanics.
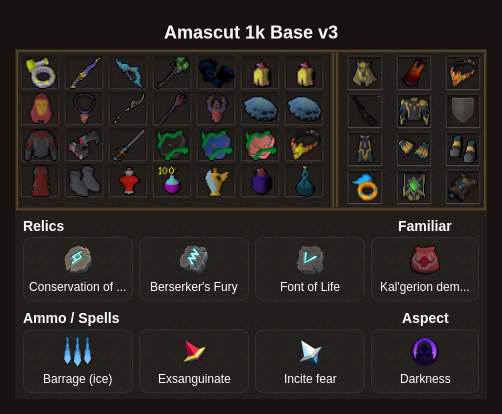
Preset Suggestions
Rotations
⬥ This guide serves as a baseline and rotations may change depending on adren from  ,
,  resets, teams speed and enrage.
⬥ For this setup, it's highly advised to have  on Magic armour and having either
  or
or 
 applied, can be forgone if enough
  stacks after p1.
Wars
Magic Start: s
Melee Start:  → s
→ s
Phase 1
Magic Start
r +  →
→  +
+  →
→  →
→  →
→  → (autocast
  )
)  →
→  +
+  →
→  → →
→ →  +
+  → →
→ →  +
+  → → → (
 → → )
→ → )
Melee Start
r + →  →
→  → s
→ s →
→  →
→  →
→  →
→  →
→  →
→  →
→  → + →
→ + →  →
→  → (
→ ( / → )
/ → )
Phase 2 and 3
Gorilla:  →
→
East Crocodile:  → +
→ +  → basics →
  right before scarabs explode utilize
  , and basics to kill the crocodiles then swap to
  , while clicking the faster side statue
Notes:
⬥ Utilize  sometime after gorilla then build up to and back up, then utilize and
  during croc handling to get a up before the blessing is deposited
Amascut
→ s → →  → → →
→ → →  → → →
→ → →  → → →
→ → →  → → → → → → → →
Notes: utilise stalling and releasing around 5.4M boss HP to avoid nulled damage.
Phase 4
This phase varies by base and team, on master+ teams it's best to immediately kill 4 scarabs and throw 2 in each portal then utilise  /
/  /
/  / /
/ /  / to handle dogs and click both portals
Amascut
Start with at least 2 stack → s → → → → → → → → → ( ) →
Phase 5
Around the time both solo charges are done and both middle fragments are at 50%, prepare with: → →
As Tumeken's reform starts, move next to Tumeken and wait till 'GET OUT OF MY WAY' → ( ) → → () → → → → → → → improvise
Notes:
⬥ It's important for G1/G2 not to move in front of the boss, until the last interceptor has moved back into charging position, this allows for continuous charging for the fastest phase time and skipping 1 jump.
⬥ All other charging roles need to swap positions with max 1t delay as well for the perfect charge.
⬥ Click middle when charge is 1t off, filled or 1t after filled on the same tick that the green lines appear on the floor.
⬥ Perfect Charge Animation: 150 Charging Method
Phase 6
→ s → → tc core →
Non Jump
→ → → →  +
+  → → →
→ → → 
Jumper
→ →  +
+  → tc + → tc + → click + → click + → → click Tumeken
Note: for TC to work while jumping you need to set your target cycle to max weapon distance, otherwise just click all the mages instead for a 1-2t slower jump.
Clones
→  + → + → → → + → →
  + → →
+ → →  → → improvise → on last tick
Phase 7
→ tc + → → → → handle p7 mechanic → → → → improvise if still not dead
Example Kills
⬥ 6:36 Kill P2/3 Berzerk and burden tanking
⬥ 6:10 Kill p2/3 Berserk and burden tanking