Rasial, the First Necromancer

Introduction
In order to fight Rasial you must complete the Alpha vs Omega quest. Rasial deals Necromancy and typeless damage, and can only be killed using Necromancy.
Positioning
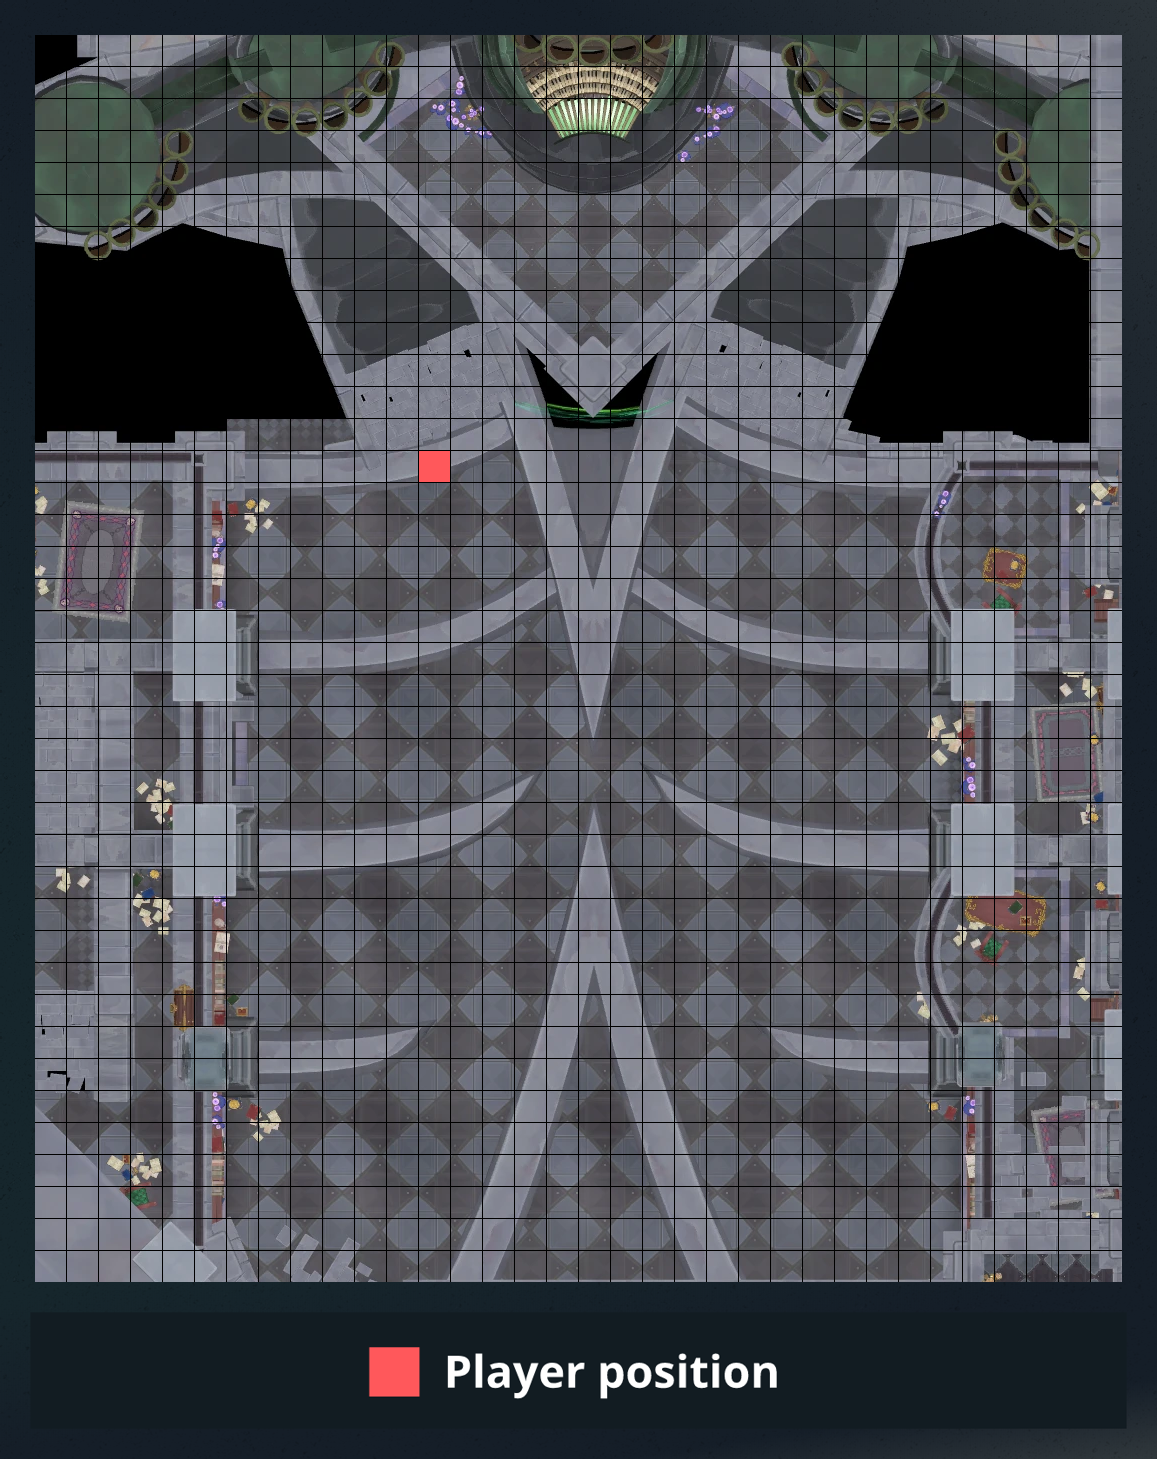 ⬥ The tile shown above serves as a safespot for the ghost wall mechanic.
• This tile is ideal as it keeps you 5 tiles away for quicker 
• For the soul obelisks, you may run 4 tiles west (toward obelisk), and 2-4 east.
⬩ Doing this allows to kill one of the soul obelisks.
⬩ This is only recommended if you have the ruthless perk.
⬥ For an in-game example of the correct tile being used, click here.
Mechanics
Requirements
The rotations may not work as well as intended if any of the following are missing:
⬥ Undead damage boosts  /
/  /
/ 
⬥  /
/  for
for
⬥ Conservation of Energy 
• Fury of the Small  (Equilibrium aura
  )
)
• Berserker's Fury  (Invigorate aura
  )
)
⬥ Invigorating 4 
⬥ Use  to mitigate damage taken or
  (Rasial is immune to familiar damage, so do not use scrolls) for it's passive, which increases damage output on lower LP targets.
• For rotation, use  with
with 
⬥ The Lunar spellbook is used for 
⬥ All of the Necromancy talent tree unlocked.
• Greater bone shield  active.
Presets and Relics
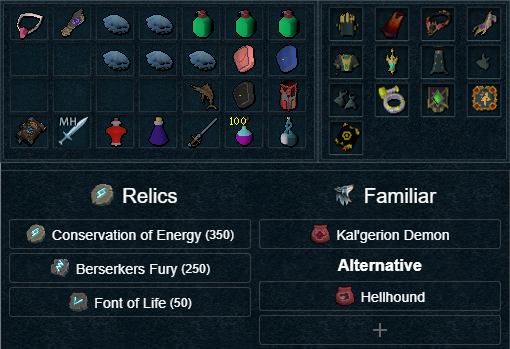
T90 Equilibrium Rotation
⬥ This rotation seeks to consistently hit around ~1:45 kill times.
• Will require more improv for lower level setups.
⬥ and  help but are not required.
⬥ Skip  if using
  armour.
Pre-build
 →
→  → + enter instance →
  +
+  +
+  →
→  →
→  +
+
Phase 1-3
Pre Living Death
(tc) +  +
+  →
→  → →
→ → 
→  → → →
→ → →
Living Death
 +
+  → → →
→ → →  →
→  →
→  → →
→ →  →
→
+ 2t → → → → → → / (if stacks) →
Note: and are used on the same tick.
Post Living Death
→ → → → →  → / → → → / → improv
Phase 4
+ → →  +
+  + → → →
 → → → →
  → → improv
Note: is optional, but may be used during immunity or phase 3.
Equilibrium Rotation
⬥ This rotation seeks to consistently hit around ~1:04.8-1:15 kill times.
• Will be slower without Innate Mastery enhancement 
•  has the potential for better times but is more variable due to proc timings
⬥  perked with
 is recommended.
⬥ At specific points during the encounter you may
• After the 3rd
• Tank the first explosion of P4, and then 
⬥ NOTE: Using too early will result in the first bounce becoming immune.
• The correct timing of is the same tick as the "Ha! No more games!" message.
Pre-build
→ + enter instance → + → + + → + (walk to tile shown above)
Phase 1-3
Pre Living Death
(tc) → → → → →
Living Death
+ → → → → → → →
→ + 2t → → → → → →
→ → → → → → improv
Note: and are used on the same tick.
Phase 4
/ → → →  / → → / → → improv
Invigorate Rotation
⬥ This rotation seeks to consistently hit around ~0:59.4-1:04.8 kill times.
• Will be slower without Innate Mastery enhancement
• Switching from to  has the potential for better times but is more variable than camping
⬩ is activated after loading preset.
⬥ with and auto fire rate set to 1.
⬥  start is not required.
⬥ At specific points during the encounter you may
• and after the 3rd
• Tank the first explosion of P4.
⬥ NOTE: Using too early will result in the first bounce becoming immune.
• The correct timing of is the same tick as the "Ha! No more games!" message.
Pre-build
→ + enter instance → + → + + → + + equip Magic MH + (walk to tile shown above)
Phase 1-3
Pre Living Death
(tc) + + equip + → → +
Note: and are used on the same tick.
Living death
→ → → → → → → →
+ 2t → → → → → → /
→ → → → → → improv
Phase 4
→ → → → → → → improv
Note: depending on crit RNG, P4 can have improvisation with / early / /
 on hit, swapping between these amulets can boost your
  may be equipped before the pre-build to boost conjure damage.
• May also be used as a switch for basic abilities after the 2nd
may be equipped before the pre-build to boost conjure damage.
• May also be used as a switch for basic abilities after the 2nd
Content Provided by: @hoobs1
Formatting Maintained by: @Unknown user