⚠️ Disclaimer
This guide is outdated with the release of

Know of a newer method, rotation or preset? Share it in #suggestions to help keep this guide up-to-date!

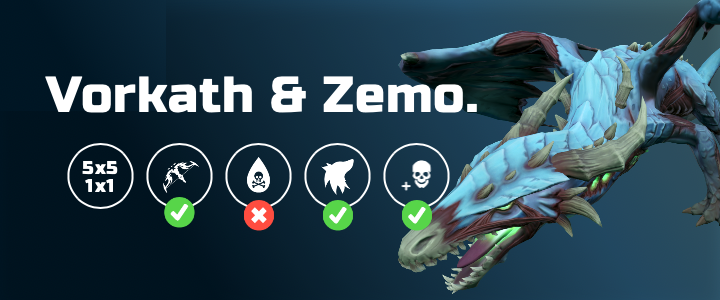
Hybrid Hardmode Zemouregal & Vorkath
Introduction
Zemouregal & Vorkath can be farmed quickly and efficiently with a hybrid setup consisting of  and
and  . Due to having access to
  Jas dragonbane arrows,
  slayer helm boost, on top of all the
  undead related boosts, this strategy can make quick work of Zemouregal & Vorkath and achieve consistent sub 2:00 kill times with the ability to optimise below 1:50.
The rotations in this guide are applicable for both solo and group Zemouregal & Vorkath, with any differences between group sizes being noted when relevant. The rotations will also work with a  necromancer in the group following the rotation in #Necromancy, although slightly slower kill times should be expected.
Applicable damage boosts for Vorkath
⬥  and work (
 and
and  do not at time of writing)
⬥ Slayer helm boost and  work while on a dragons cluster, blue dragons or undead cluster slayer task.
⬥  Salve amulet works
⬥ Jas dragonbane arrows work
Lifepoint scaling (Hardmode)
⬥ Vorkath: 1500k  per player
⬥ Zemouregal: 500k per player
Mechanics (Hardmode)
Preset and Relics
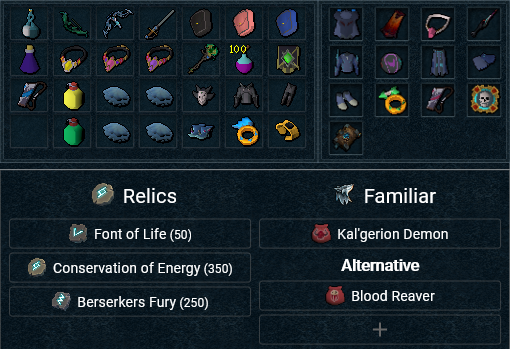
 Powder of penance activated at bank (can take a way to restore prayer in preset instead)
⬥
Powder of penance activated at bank (can take a way to restore prayer in preset instead)
⬥  EoFs with
 Fight Overview
⬥ Use  and camp
  in group to drastically reduce the amount of damage taken by the Zemouregal tank.
⬥ Any abilities in this guide with  before it indicates that it's performed with the physical SGB equipped. Aside from the
  special attack, this also serves the purpose of maintaining current
  stacks for the rotation.
⬥ The Zombie Shielder won't be cleared by  alone when in a group. One player should
  →
→  to finish it off if it's in the first set of minion spawns, depending on group size.
⬥ Optionally,  may be taken to be used for the first
  rotation, as it can still be consistently done with for higher overall damage. A swap to
  alongside the swap should still be done and kept on as the remainder of the fight is inconsistent without the extra critical hit chance.
⬥ The rotation requires some improvisation around  critical hits and phase timing. The main focus is putting up
  as early as possible after
  , getting off
 for the defence drain on Zemouregal, doing as much damage as possible with
  and thresholds, and then stalling
  into
into  →
→  . Check out example kills for stall timing.
⬥ Zemouregal's attack rotation at the end of the fight can change based on phase timing but with the rotations in this guide, will involve  →
→  →
→  → 3x →
  for those flicking
  in
in  . Players not tanking Zemouregal will only have to be careful of .
⬥ On slower kills it may be preferable to do a second rotation after the 2nd ends if Zemouregal still has significant HP remaining.
Rotation
Pre-kill
⬥ Wars  : stall
• Hold stall with  /
/ 
Phase 1 + 2
⬥ Enter instance +  + + → +
  →
→  +
+  → (wait 2t ) →
  →
→  →
→  →
→  →
→  →
→  + →
+ →  /
/  → target Zemouregal + target Vorkath →
  + stall
  → release + → → → → → →
⬩ Replace / with if grouped and not responsible for on Zemouregal.
⬩ Stalling lines the explosion up with a proc.
Flight
⬥ →  + →
+ →  → + → →
  → target Zemouregal → + →
  → → stall → release + → →
  → →
→ →
• Both should target Zemouregal to hit both bosses. See example kills for positioning.
Phase 3 + Zemouregal
⬥ to avoid Bone Spikes + + auto →  → →
→ →  + → → → → → + switch to
  when Vorkath dies → → → → → → /
  → → → → → + adjust for procs until dead
Alternate Phase 3 + Zemouregal
This rotation can be done with an early swap to  before the last ability in , such that the charging effect becomes active earlier. The in the first must be wenspored to receive both arrow effects.
⬥ to avoid Bone Spikes + + auto → → → → → → + switch to when Vorkath dies → → → → → → → → /  → → → + adjust for procs until dead.
Example Kills
Content Provided by: @rocket_cars
Formatting Maintained by: @Unknown user