⚠️ Disclaimer
Some methods in this guide may not work after the combat beta changes in March 2026
Know of a newer method/rotation? Got a video? Share it in #vod-and-rotation-megadump-2-electric-boogaloo!
Vorago: Solo NM Ranged
Introduction
This guide focuses primarily on rotations for achieving solo Grandmaster timers using Decimation-SGB strategies, and assumes a strong familiarity with Vorago's mechanics and phase timings. For more detailed information on mechanics and casual strategies, read the other Solo NM guide.
Presets and Relics
⬥ Ranged
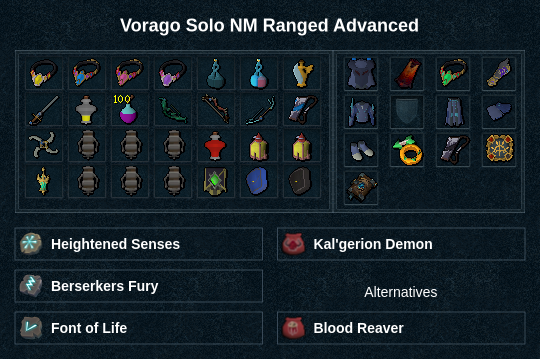
Preset Notes:
⬥ 
 Zamorak Bow,
 Dark Bow,
 SGB,
SGB, 
 ECB,
ECB, 
 Decimation
⬥ ECB EoF is only used on TS/PB, may be replaced with  food otherwise
⬥  Powerburst of vitality may be replaced with food for ceilings/GB/PB, or
  numbing roots to clear the first bleed on Vitalis P4 losslessly
⬥  Glaive is used for excal stalling without needing bolts, may be replaced with any darts or throwing axes
⬥ Dark bow has  Invigorating 4 for autos
⬥  Crystal bow has
  Energising 4 for
  (optionally has
  Caroming 4 for
  with fewer switches)
Phase 1
Max hit dummy at War's Retreat:
 →
→  → →
→ →  → →
→ → 
 →
→ 
 →
→  → → stall
 → charge to full adren on crystal
Face:
release + → challenge + → →  →
→  + auto → → →
  +
+  + d/a
+ d/a 
Drop:
 +
+  + drop +
  →
→  +
+ 
 (swap to at 1.2s left) → at 0.6s left step back, lose 1t stall
  +
+  +
+  → release + + → TC + + click climb rock, lose 1t
Climb:
Equip  +
+  +
+  during
  climb, on last platform +
  , on land
  + TC +
Get 15 stacks after on after killing rago
Phase 2
Drop
Maintaining stacks, apply and 15%  with / while clearing bleeds. Use
  on reflect, as it ends
  → →
→ →  + away → → → → → → improvise to below 30k HP while clearing bleeds.
Bring Him Down
Drop halfway through BHD, get 8+ stacks and 1-5  stacks, then spam click
  when BHD ends → → → → → ( instead if 2+ stacks) → lose 1t → TC + → →
  → + auto → → → →
Phase 3
Ceilings/Vitalis/Green Bomb
 + + drop → → + → equip + → + (swap to after 3 hits) → + → → → if not dead, target and improvise.
Teamsplit
+ + drop → → → equip + → → + → → + → → →
Scopulus
Drop + TC + + east → + auto → → equip + → + stall + east → TC + release + → TC + ( just before first  hits) → + → + → →
Purple Bomb
Drop + TC + + east → + auto → equip + → + + → stall  → TC + release + → target → → stall → click release + → + → → → →
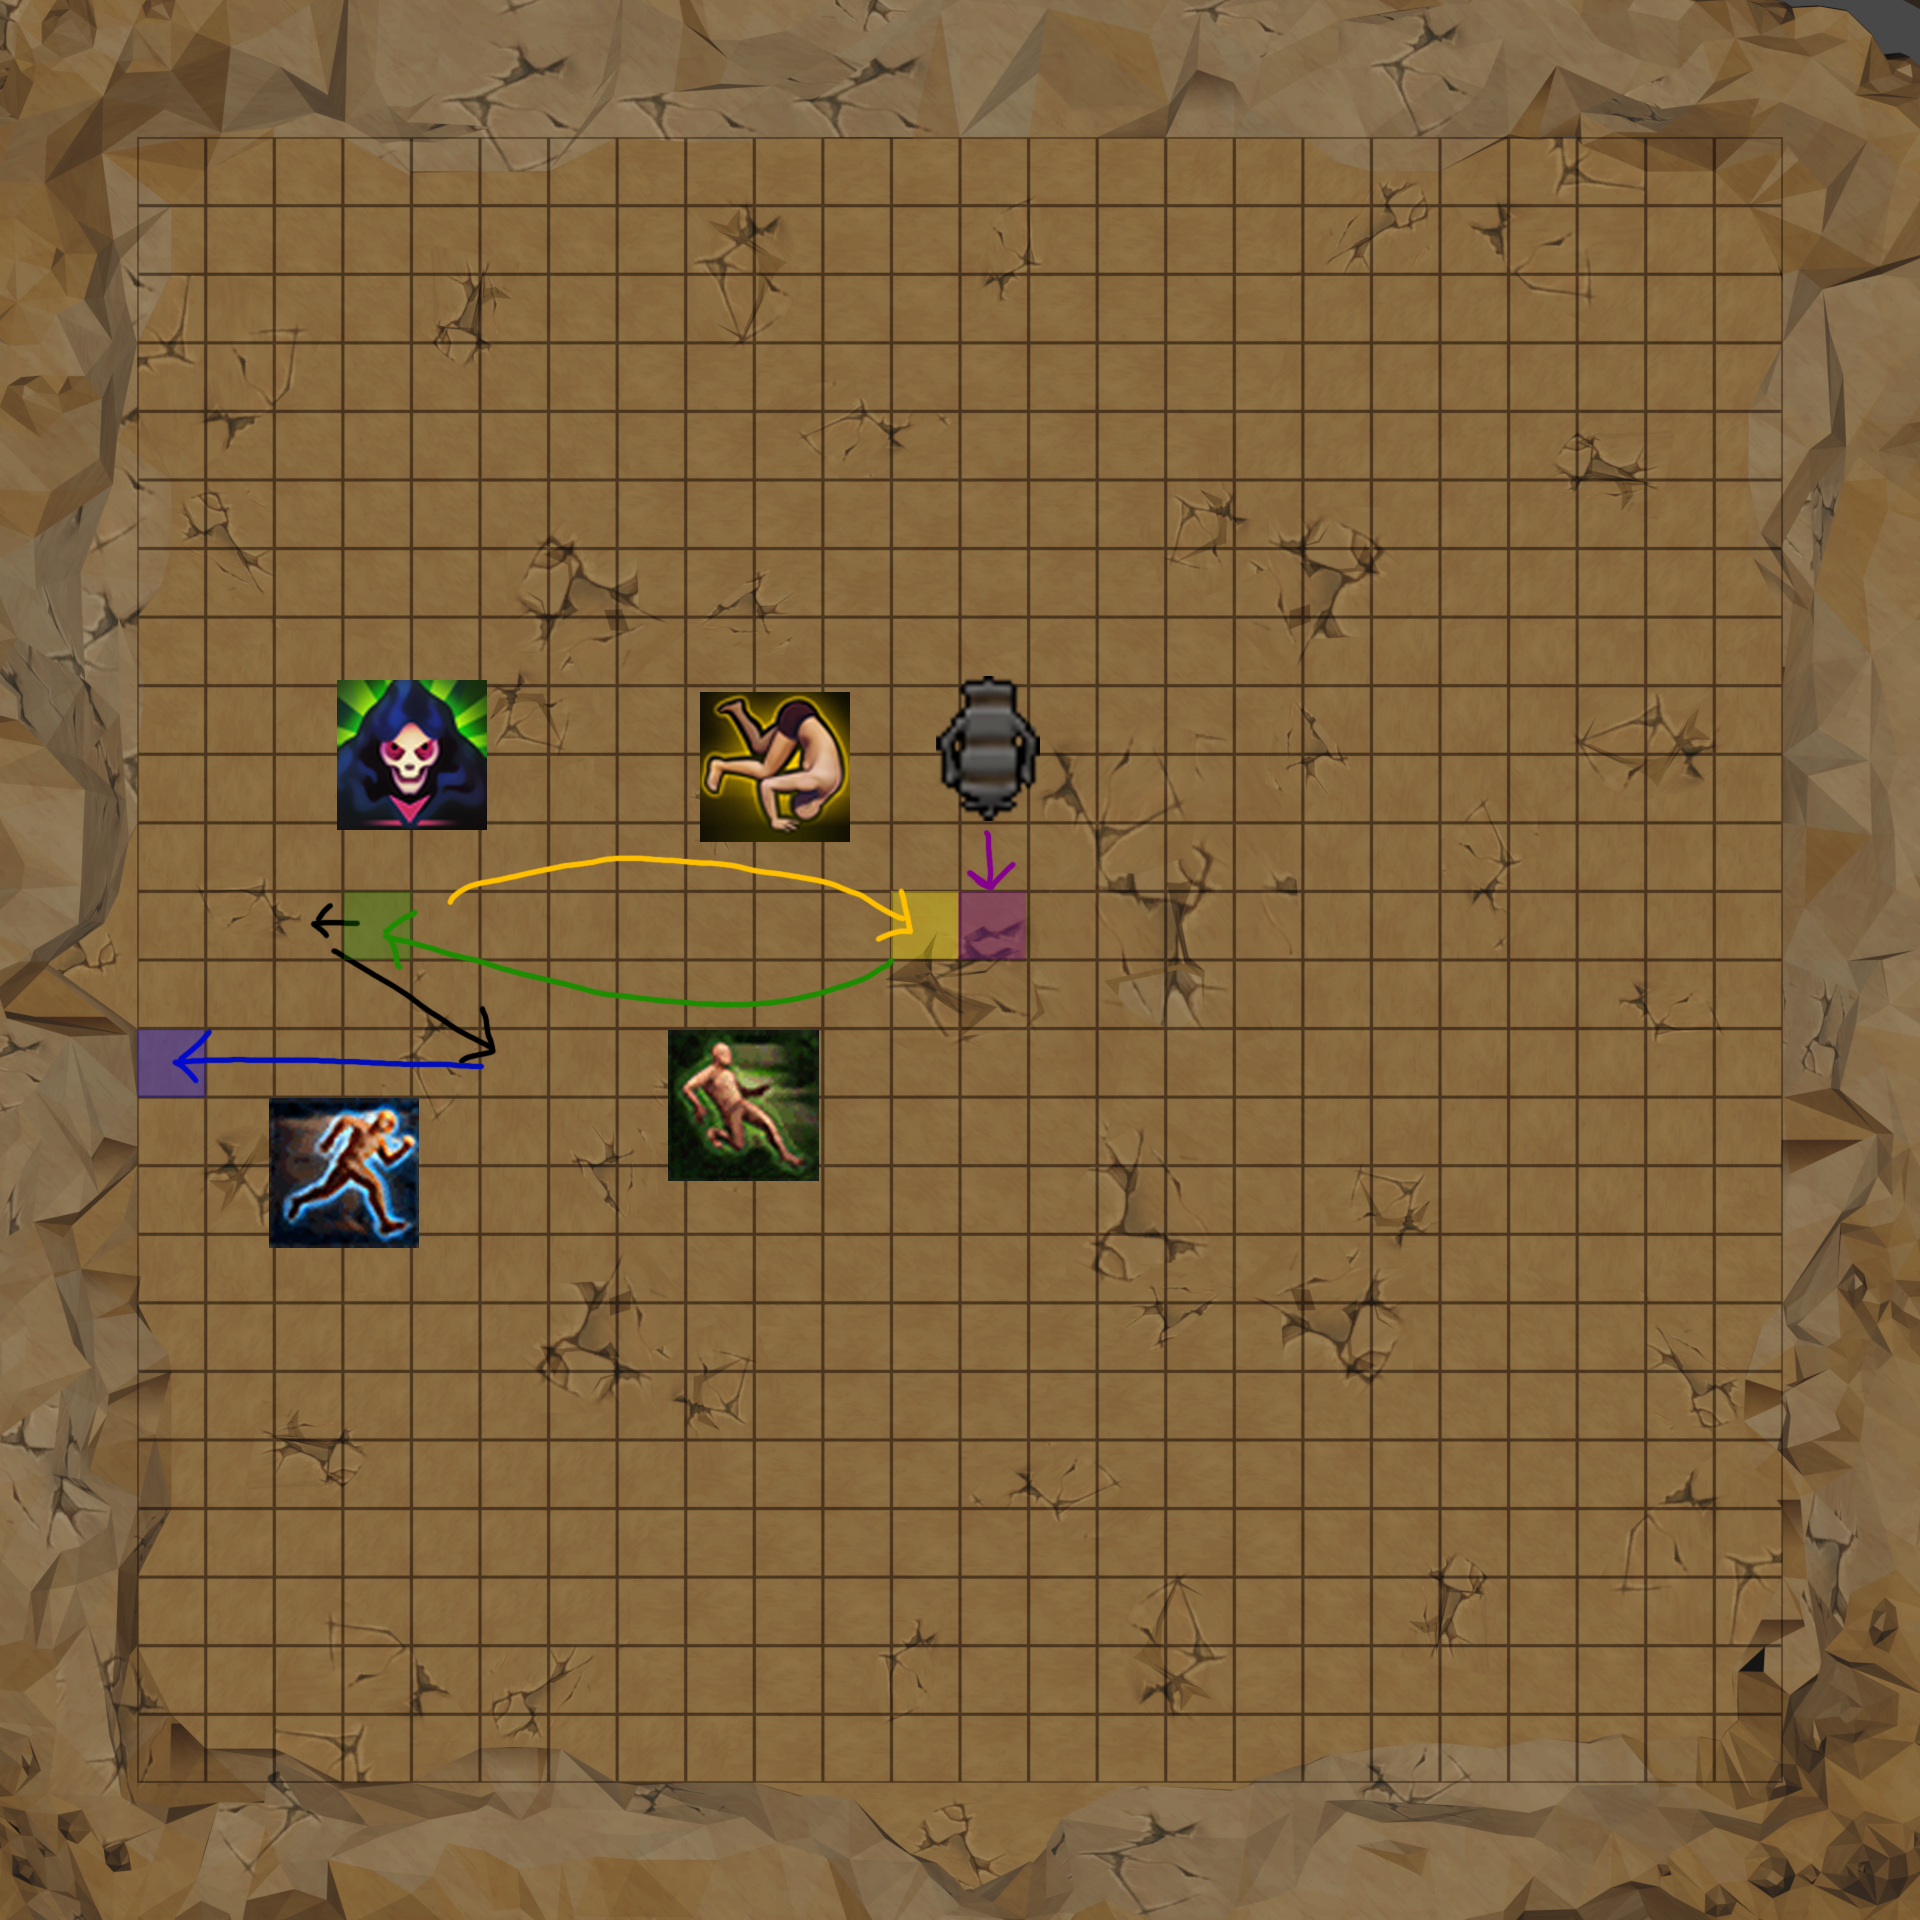
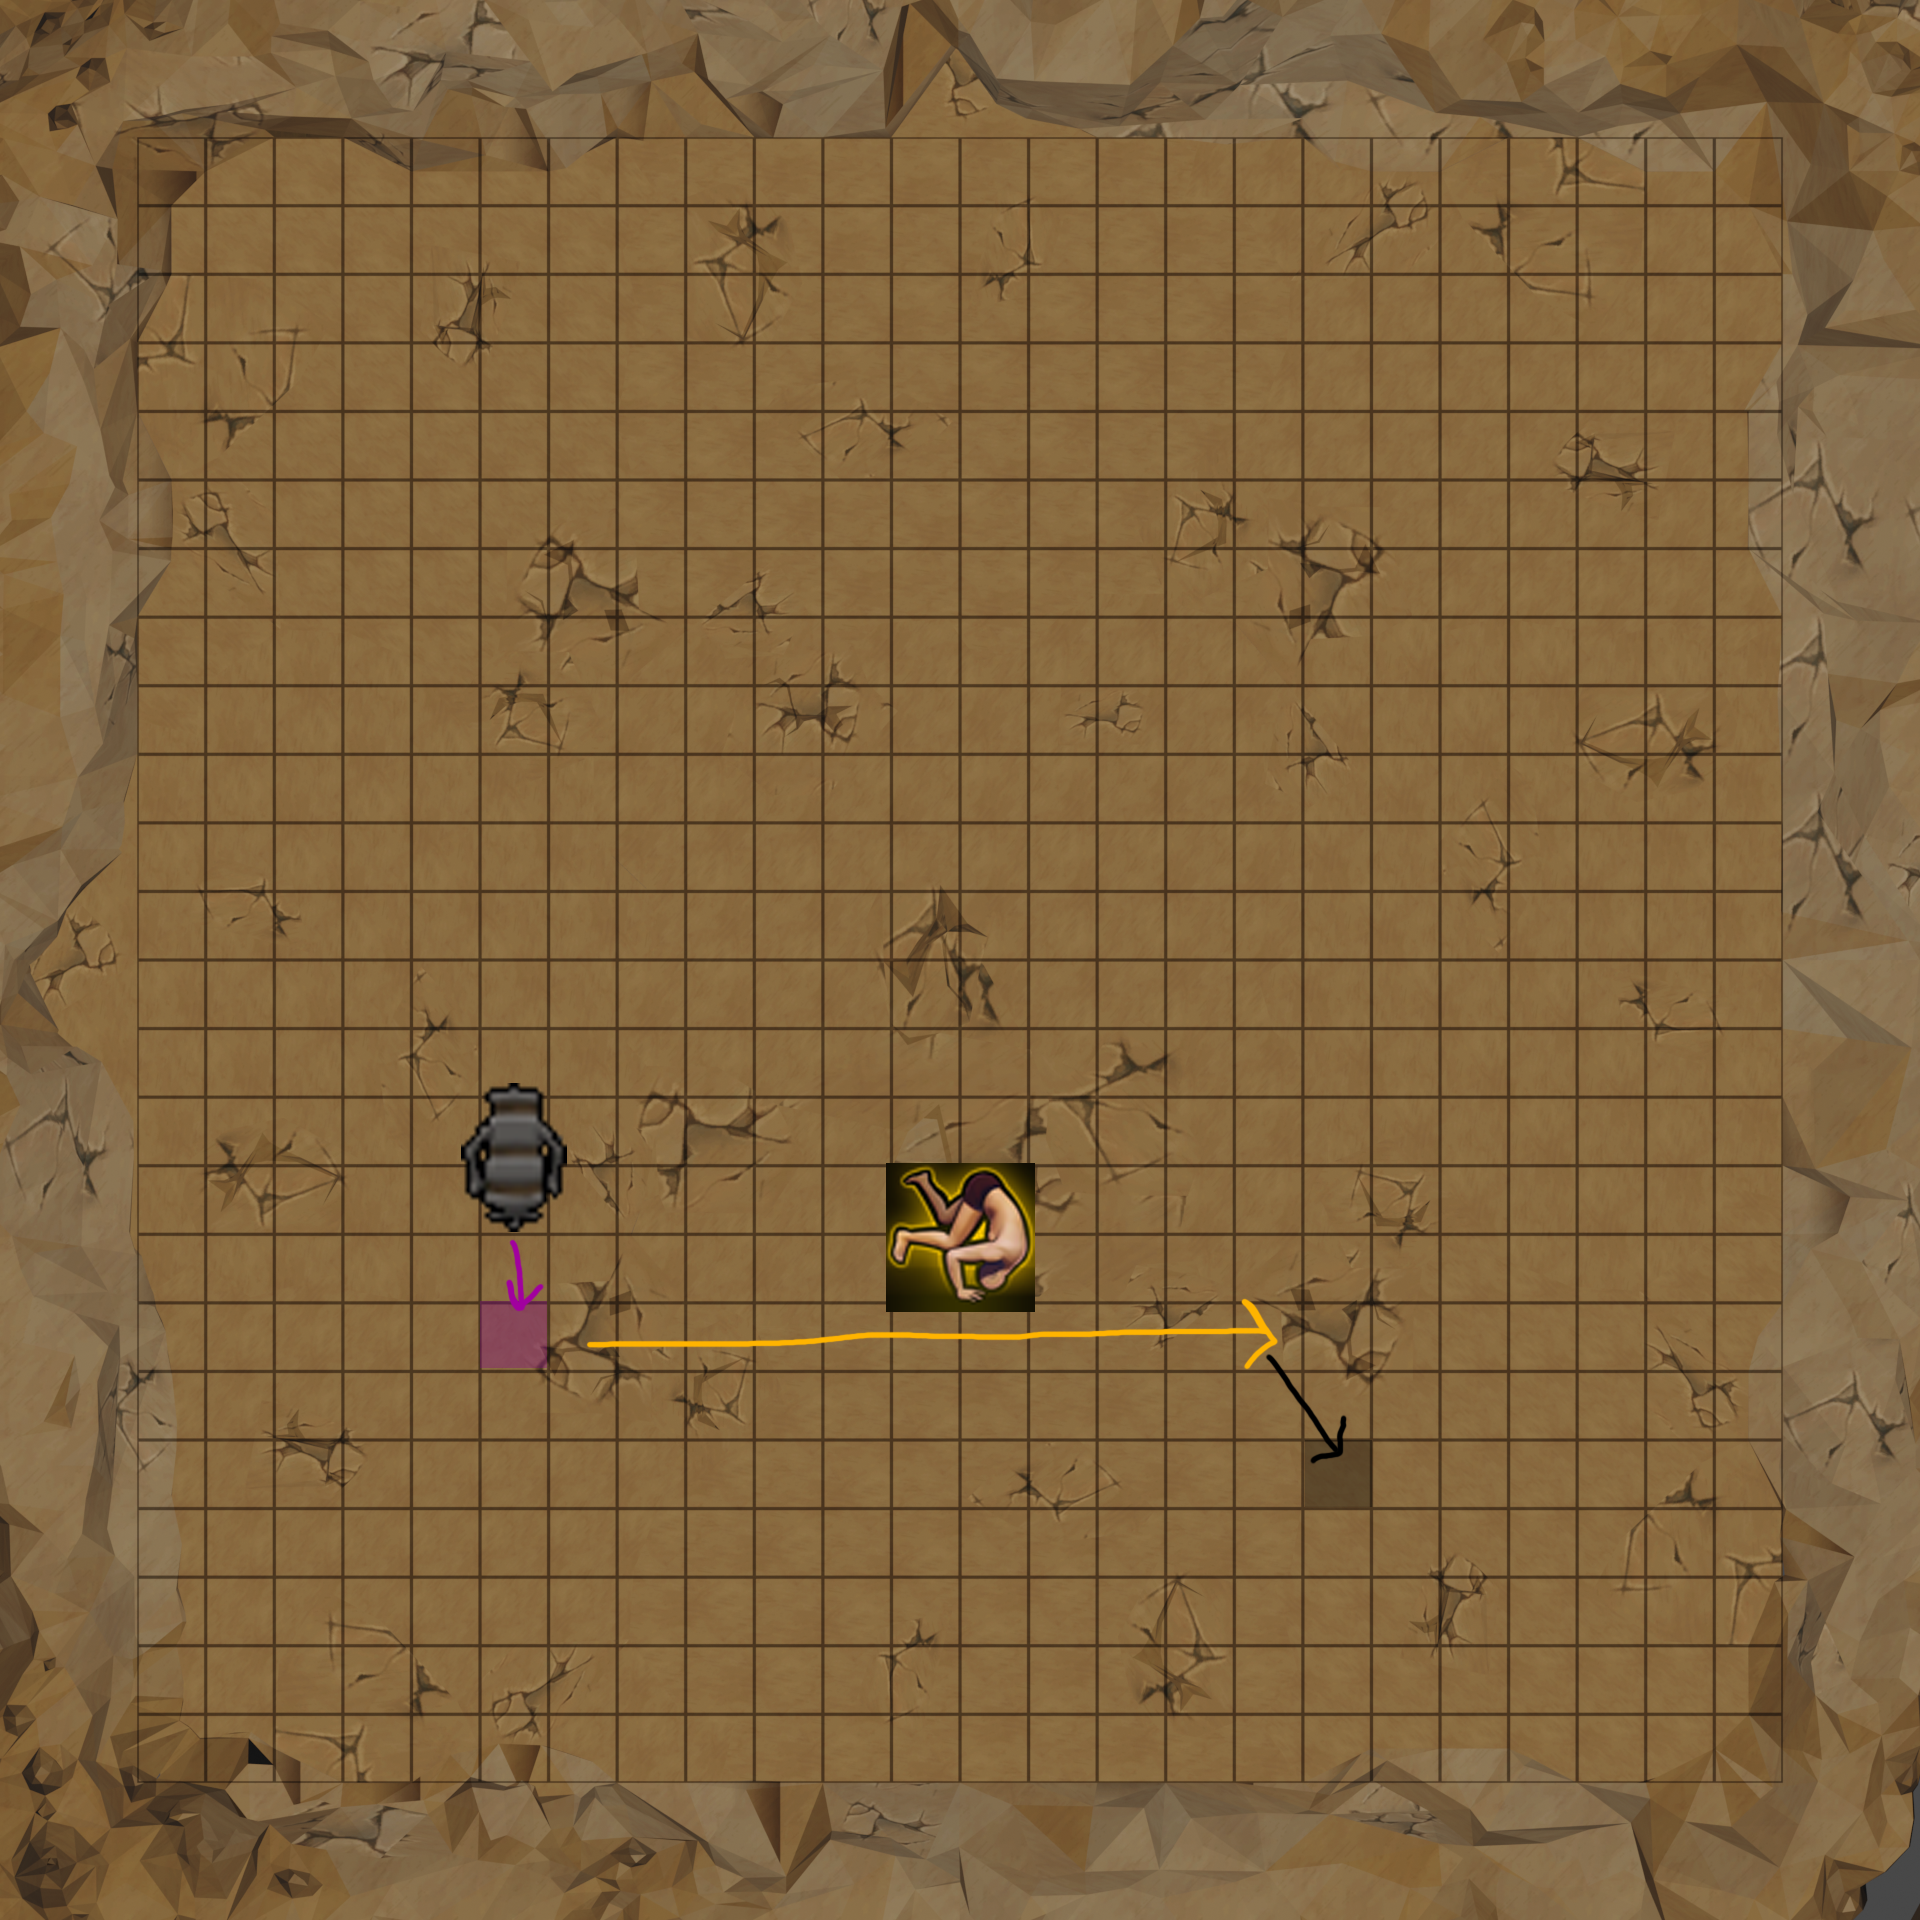
The image below shows positioning for ceil/vit/GB/TS.
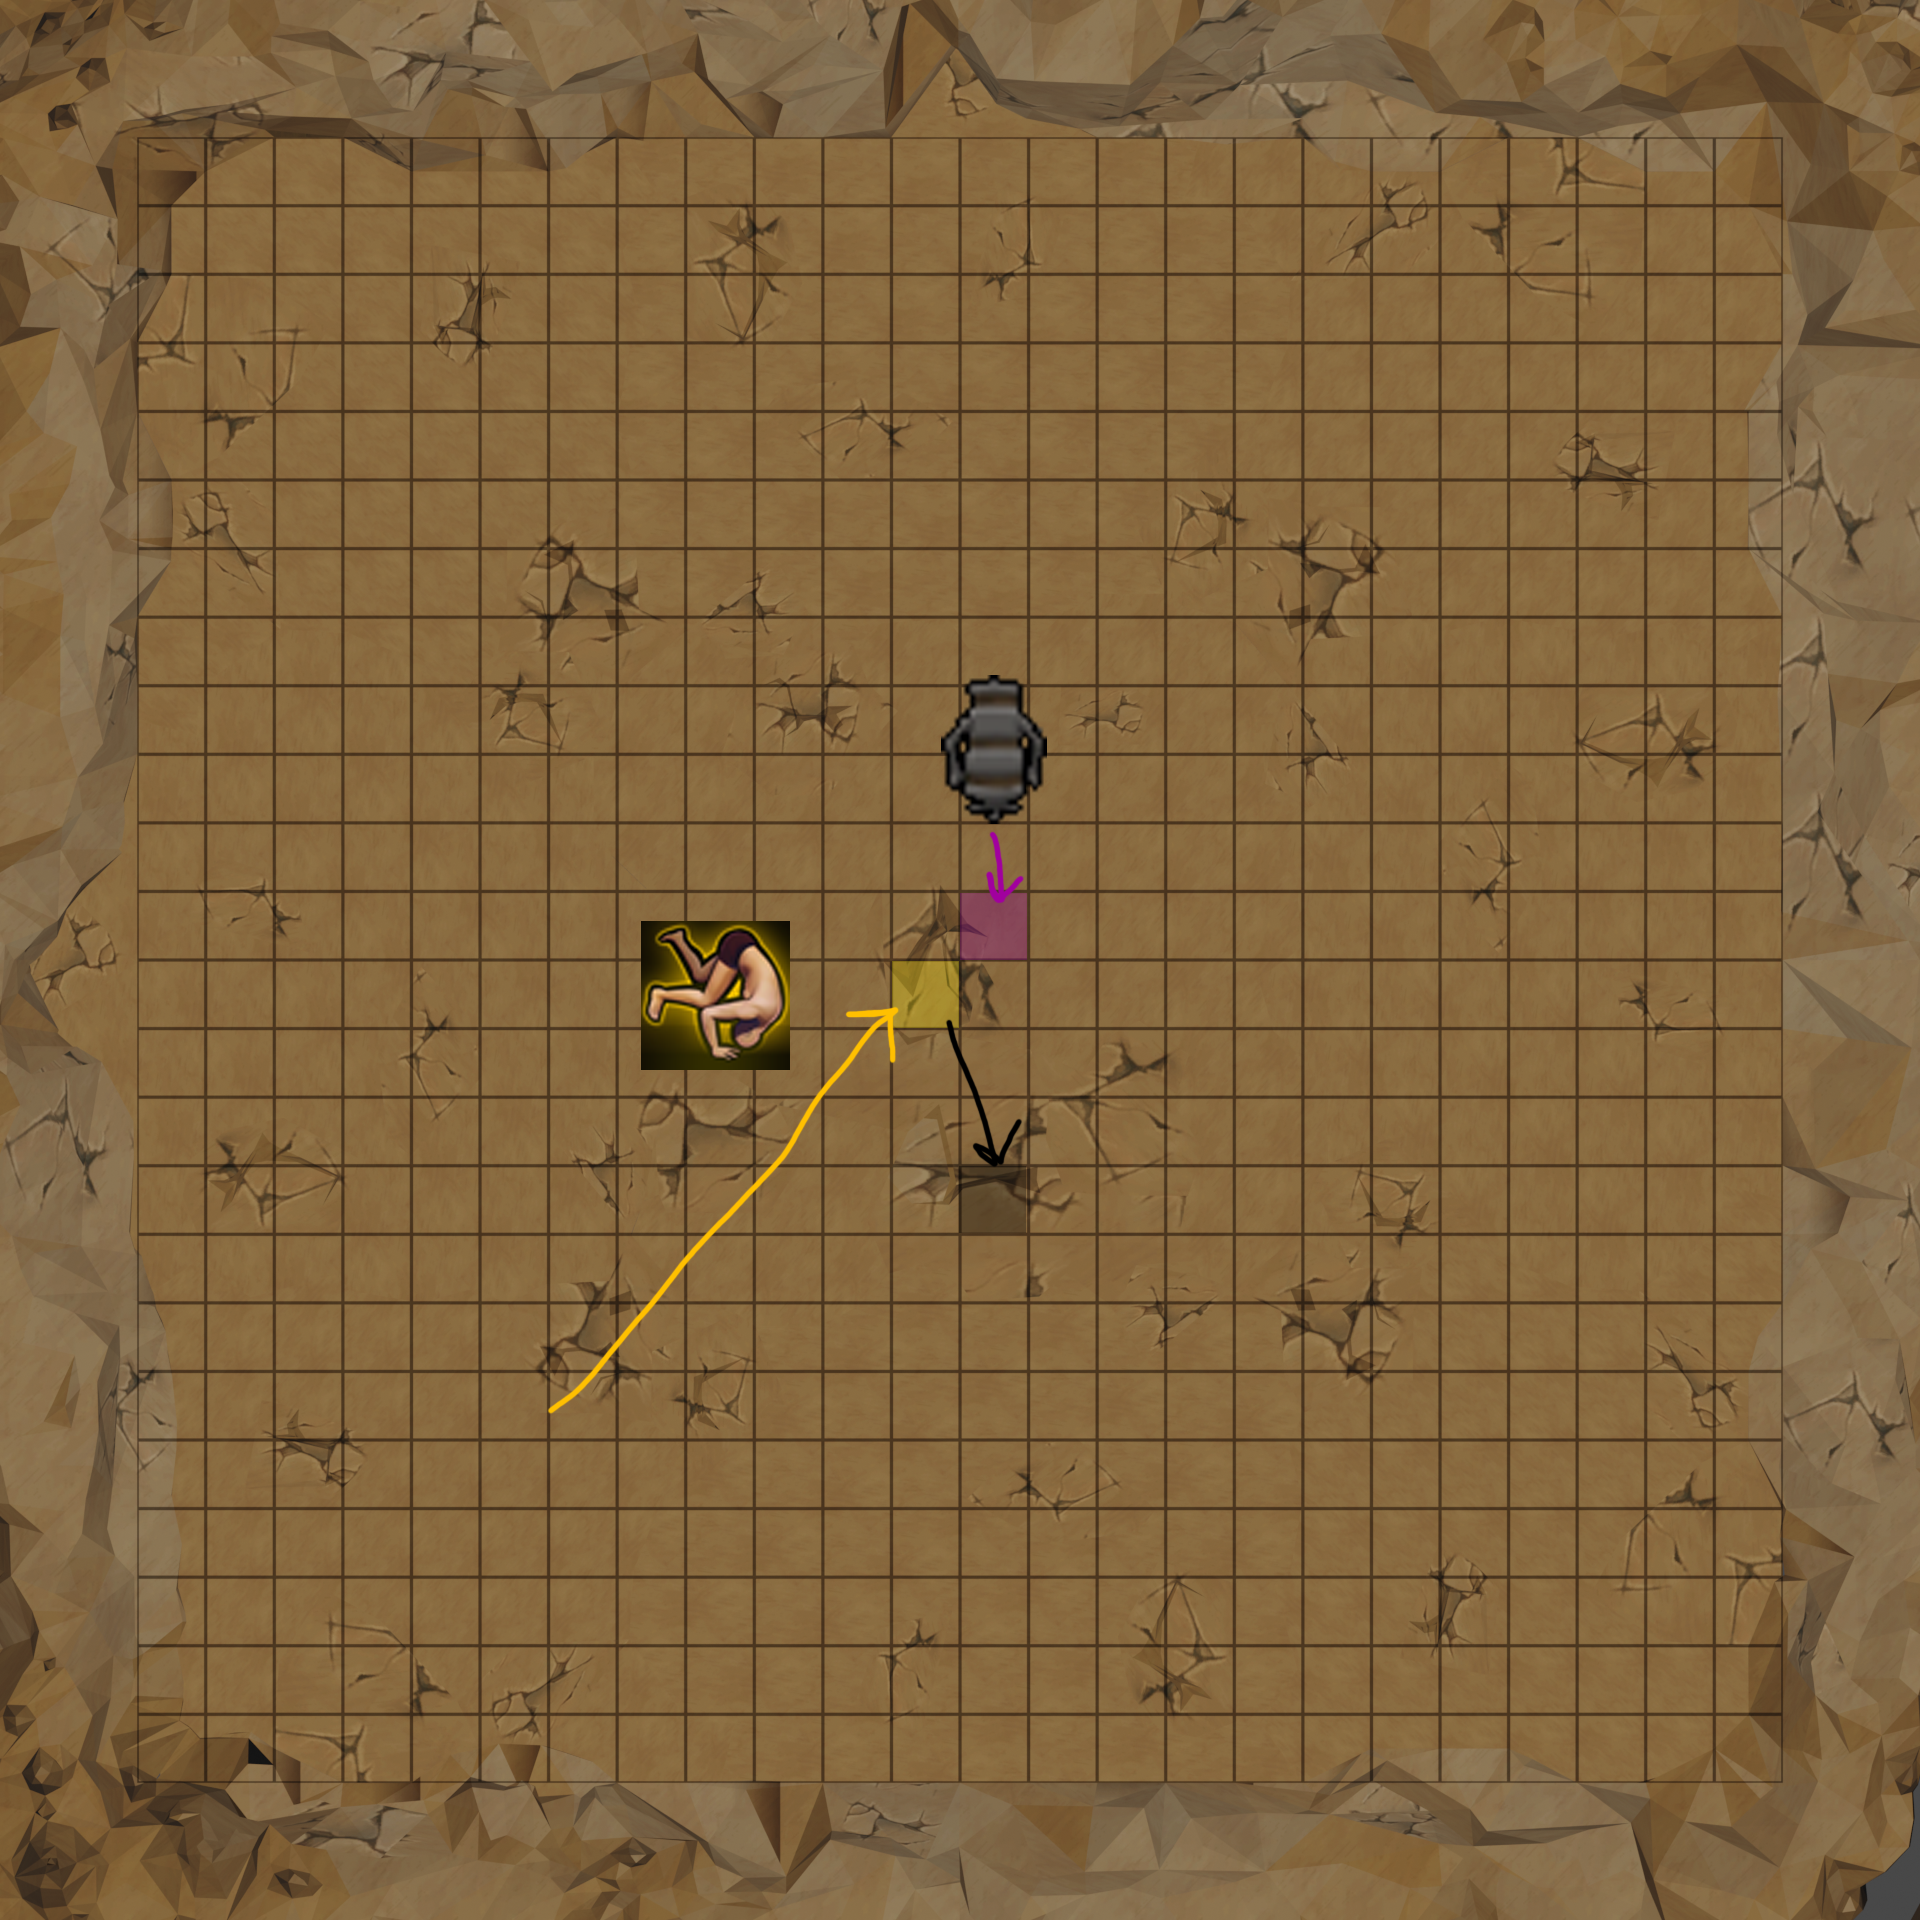
The image below shows positioning for scop/PB.
Phase 4
Apply , handle mechanics and get below 30k HP before last waterfall:
⬥ during reflect or to help tank 
⬥  or
or  +
+  + for
+ for 
⬥ For vitalis, get 8  before the orb, or and to the orb, then + →
  →
→  → →
→ →  and use numbing root to clear the first bleed
⬥ TS may be broken to save time by doing → 2 GCDs → close  out of waterfall
1 auto before second reflect, drop → TC + → → → → (switch off if 3+ stacks) → → TC + equip
During last waterfall spam on → TC + → ( if fewer than 2 stacks) → → + auto → → → →
Assemble the  during build, stand west of the so that you face east for the on P5 drop.
Phase 5
Unlike in previous phases, will only clear the effect of once 2t after spawn, and will remain under the effect of after the second one is thrown.
Drop + TC + + → + auto → equip + → → + stall + → TC + release + → + + take 2 steps back → → → + → → / + +
Example Kills
Note that these kills do not follow the exact rotations outlined in this guide, but show general positioning and mechanic management.