Vindicta and Gorvek
 Melee Strategy
Presets and Relics

Rotation
⬥ Refer to the linked video to see how the BDs and Surges between kills look like - https://youtu.be/12qTzSHLTTs
• This is a Helwyr sample, but the method of going between kills is the same.
⬥ If your HP gets really low then utilise Disrupt 
⬥ This rotation consistently hits 11-13 second kills. It requires teleporting to Wars Retreat between kills for adrenaline.

 → War's adrenaline crystal to 100% → enter instance →
  +
+  +
+ 
 + (tc)
  →
→  →
→  →
→  →
→  →
→ 
 →
→  →
→  →
→  →
→ 
 Necromancy Strategy
Presets and Relics
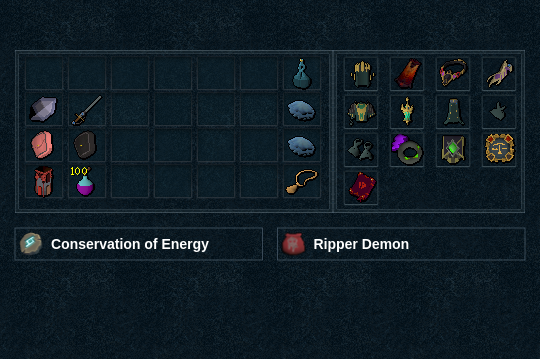
Rotation
⬥ You may  twice per set of conjures.
⬥ If your  hits during Vindicta's phase transition it will deal significantly less damage.
• You may opt to  before it at the cost of higher
  usage.
• Alternatively adjust your timing.
⬥ Darkness  is optional to reduce damage taken.
⬥ This rotation consistently hits 15-16 second kills. It requires teleporting to Wars Retreat between kills for adrenaline.
Wars
 →100% Adrenaline →
  + enter portal
Inside instance
 + right-click 'rejoin' →
  + right-click 'quick enter' →
  +
+  to Vindicta spawn (this will bring your conjures inside)
Main fight
 →
→  → (tc) + +
  →
→  →
→  →
→  →
→  → → → Improvise
Example Kills
Melee example (5 minutes) - https://youtu.be/DaMSpp3zU5o
Necromancy example (5 minutes) - https://youtu.be/JxkejISC0Ms
Content Provided by: @neonx222 and @hoobhoobhooray
Formatting Maintained by: @neonx222 and @epsilon39