⚠️ Disclaimer
Some methods in this guide may not work after the combat beta changes in March 2026
Know of a newer method/rotation? Got a video? Share it in #vod-and-rotation-megadump-2-electric-boogaloo!
Melee Telos

Introduction
This guide assumes a very strong understanding of everything found in #telos-basic, #Stuns & Mechanics Overview and #P5 Movement & Timing.
This guide assumes 250%+ and works best at 1000%+, but these rotations still work below 250% with some tweaks. Adjust accordingly from there - below 250%, these rotations can be loosely followed but after that, you definitely want to make sure you follow them.
Notable Enrage Checkpoints and Changes past 999%
⬥ 1000%: P4 one rock will fall, P5 multiple rocks will fall, immortality no longer works P5, and Telos will freedom stuns and binds with a 16 tick cooldown
⬥ 2000%: "So you think you can guard?" Achievement, aka Silver Warden
⬥ 2700%: Tendrils damage required caps at 30,000
⬥ 3300%: The first prayer drain on P3 will smite you from full unless Telos touches the beam
⬥ 4000%: Hard enrage cap; "The True Warden" Achievement, aka Gold Warden
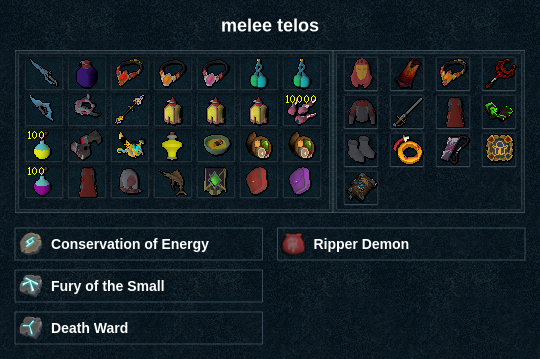
Presets and Relics

Rotations
Phase 1
Note: these rotations depend upon proper P1 entry + Target Cycle (tc) timing; e.g. defensive → (wait 2t) → surge → defensive → tc tick. Use sample kills as a reference, or this video: https://youtu.be/wveIsE9Y0C8

 →
→ 

 →
→  →
→ 
 →
→ 
 →
→  →
→  →
→  →
→ 
⬥ Can prephase a  if you get lucky on adren
Phase 2
 → 5taa
  →
→ 
 →
→  →
→ 
 →
→  →
→  →
→  → →
→ →  →
→
⬥ Can skip if its low hp
Phase 3
→ →  → → → →
  →
→
Phase 4
The goal here is to phase Telos into each font before he can fire off any special attacks, so rocks are completely skipped. For help using  , refer to Sticky Bomb Guide for Phase 4/5 below.
Drop
→ →  → to front
Font 1
 →
→  →
→ 
 →
→  →
→  →
→
Stall → → →
Font 2
→ →  →
→  → → last tick of gcd
wait 2t post gcd →  →
→  stall → + +
Font 3
/ → → → → → stall →
Phase 5
Note: for more information on timing & moving efficiently throughout P5, read: #P5 Movement & Timing
→ → 
 → → →
→ → →  → 2x
→ 2x  → → →
→ → →
⬥Replace with if backbeam and  if you get Volcanics
Sticky Bomb Guide for Phase 4/5
Phase 4 General Notes
⬥ Sticky bombs take 3 ticks to land when thrown, and creates a 3x3 area that will make bindable/stunnable enemies get stuck.
⬥ Phase Telos to hp cap then run into the appropriate font.
⬥ Once font is depleted click on sticky bomb and use the right click option on middle golem. Don't drop sticky yet.
• Throw the first sticky bomb when you get the popup message You dare defy me?
• Throw the second sticky bomb directly beyond the first sticky bomb when you get the popup message Telos is preparing to fire an anima bomb!
⬥ When you barge and start damaging Telos, put yourself in a direct line beyond the minions and the sticky bombs so they stay in line and run into the next sticky bomb rather than dispersing and running around the bomb.
Note: there are pre-barge and non pre-barge strategies to damage Telos between fonts. This section will have examples showing pre-barge.
Font 1 sticky bomb example:
Font 2 sticky bomb example:
Note: The player did a faster font 2 method where they went straight into the font, then ran out to the waiting spot to line up minions, and then back in. The safest way is to go directly to the wait spot and let minions stack there.
Font 3 wrap around method:
Example Kills
⬥ 2:40 https://youtu.be/bpb7sqS_adU?si=StoCh1bEYHUIyYuE