Sanctum of Rebirth Hard Mode - Solo Melee 
Introduction
This is an advanced guide and assumes a deep understanding of the boss's rotations and mechanics for the Hard Mode version of the Sanctum of Rebirth, found in #Sanctum HM Mechanics.
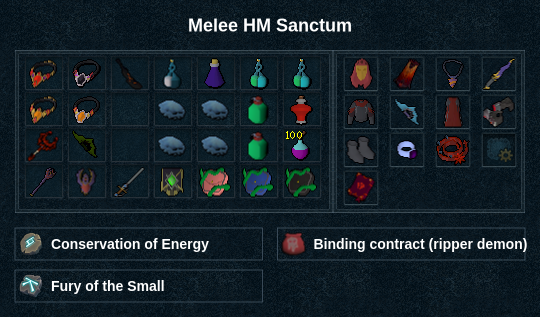
Presets and Relics
⬥ Melee
Vermyx, Brood Mother
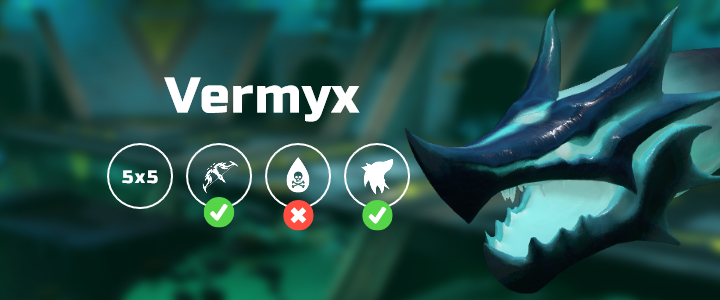
⬥ Release all s with
with 
⬥ Gear must be perked with Equilibrium 4 
Pre-fight
 +
+ 
Phase 1
 →
→  →
→  →
→  →
→  → (
→ ( )
)
Coilspawn
 → (tc) +
  → → →
→ → → 
 → s
→ s → → s
→ → s
Phase 2
r + → →
Coilspawn

 →
→  → s → s → s → s → → s → s
Phase 3
→  →
→  → → → →
  →
→  →
→  → ( →
→ ( →  )
)
Kezalam, the Wanderer
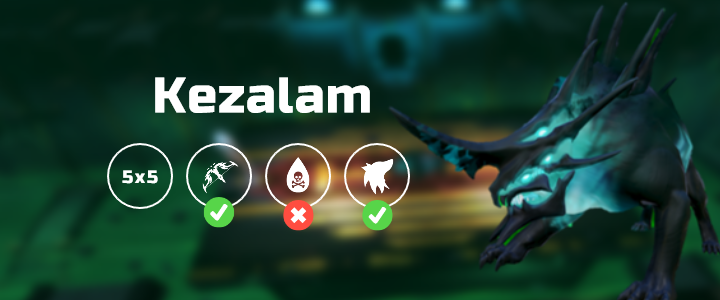
⬥ Release all s with
⬥ Gear must be perked with Equilibrium 4
War's Retreat
s
Pre-fight (Moonstone Obelisk 1)
r + → → → → → → s
Phase 1
→ → → + → → → →
Moonstone Obelisk 1
→ → → 
Phase 2
→  +
+  + (8t) → → s → r + →
  + click →
  → (7t) → → → ( → → etc)
Moonstone Obelisk 2
→ →
Phase 3
→ → → → s → → → → → → → → ()
Nakatra, Devourer Eternal
⬥ Release all s and with
⬥ Gear must be perked with Equilibrium 4
War's Retreat
s
Phase 1
r + → → → → → → → → s → r +
Phase 2
+ →  → → → → → + (7t) → +
  → +
→ +  →
→
Phase 3
Nefthys 1
→ → → → ()
Nefthys 2
 +
+  → → → → →
Prephase
→  → →
→ →
Phase 4
Shadowsands
+  + → (tc) → (tc) → (leave)
Nakatra
(2t tc) + → → + → s → r + → → s → r + → → →
Example Kills
⬥ Vermyx
⬥ Kezalam
⬥ Nakatra