⚠️ Disclaimer
Some methods in this guide may not work after the combat beta changes in March 2026
Know of a newer method/rotation? Got a video? Share it in #vod-and-rotation-megadump-2-electric-boogaloo!
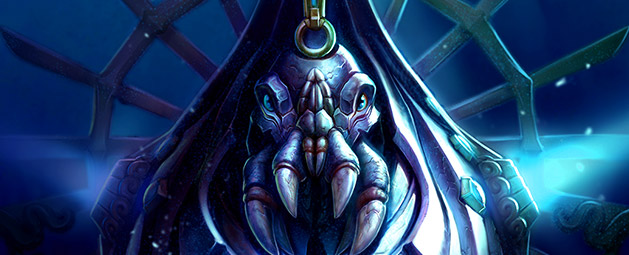
The Shadow Reef
Introduction
This is an advanced guide which assumes a strong underlying knowledge of all mechanics and information presented in #ED3 Basic Guide.
General Notes
⬥ The rotations listed for the bosses are for an advanced setup, lower tiered set-ups will require improvisation.
⬥ It's recommended to set your anti-spam delay for your Double Surge  to 1 via the Lectern at Anachronia.
⬥ Consider downgrading your graphics to Minimum with Medium+ draw distance for the Dungeon, as it is poorly optimised and prone to frame drops.
⬥ You can Surge or Bladed Dive  a tick before each gate unlocks to save a tick on every entry.
Disclaimer: The GIFs for boss mechanic descriptions were done under Story Mode.
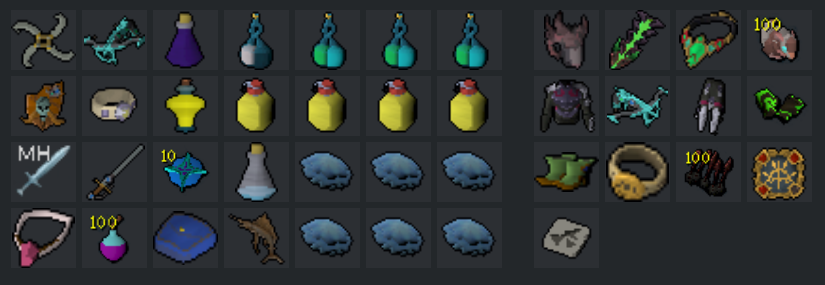
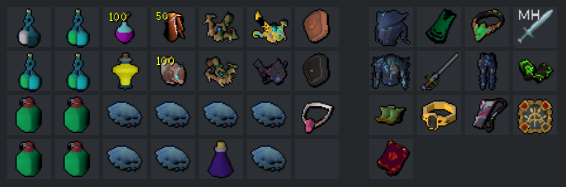
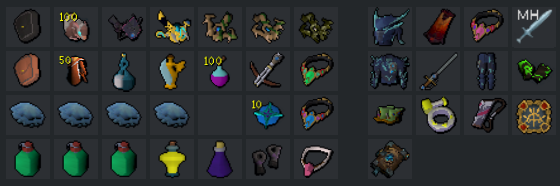
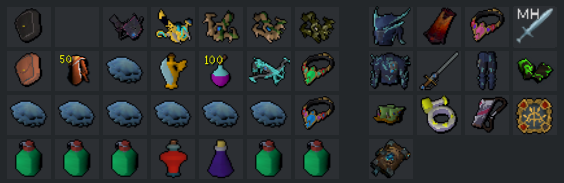
Presets 
General Notes
⬥ Two presets are sufficient for the Reef, the second one is for The Ambassador, as Vitality  and Flanking
  are used for the fight.
•  Luck of the Dwarves will not improve unique drop rates.
⬥ Reckless  is the best aura for the dungeon, followed by Inspiration
  then Mahjarrat
  .
.
• Reckless allows you to bring a Reaver's Ring  without having any hitchance issues
⬥  Lucky Charms are optional, they average up to 1.2m per run.
• Tokens are better spent on Port Enhancers for Superior Scrimshaws or obtaining Seasinger weapons.
• These don't enhance Eldritch piece drop rates.
⬥ 
 Kal'gerion demon is best used in this dungeon.
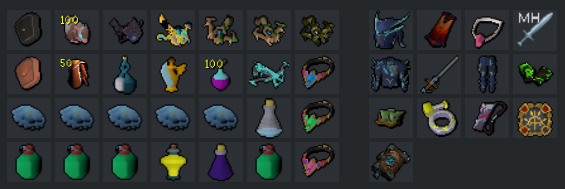
Equipment Details
⬥  Salve Amulet used for Taraket, Skeletons, Zombies and Undead Witch.
⬥  Dreadnips can be used at all bosses.
• Can be skipped if food is in need.
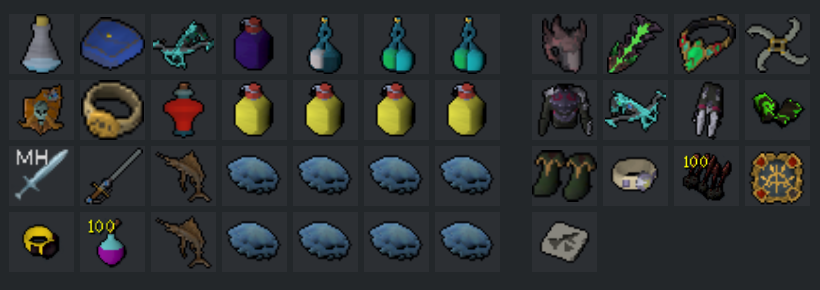
⬥  with Dark Bow
⬥  with Seren Godbow
⬥  with Eldritch Crossbow
⬥  with
with 

⬥ 


⬥ 


Crassian to Pre-Taraket
⬥  Nightmare Gauntlets switch is optional.
⬥  Lunging switch is optional.
⬥  Erethdor's grimoire to overcome hitcaps and benefit more from Incendiary Shot
  .
.
⬥ Basic
⬥ Advanced
⬥ Advanced - ECB EoF
Taraket to Pre-Ambassador^^** (Optional)
⬥ Erethdor's grimoire to overcome hitcaps and benefit more from .
⬥ Advanced

⬥ Advanced - ECB EoF
Ambassador
⬥ Vitality Potion used for Split Soul 
⬥ Erethdor's grimoire to benefit more from Incendiary Shot
⬥ Basic
⬥ Advanced

⬥ Advanced - ECB EoF
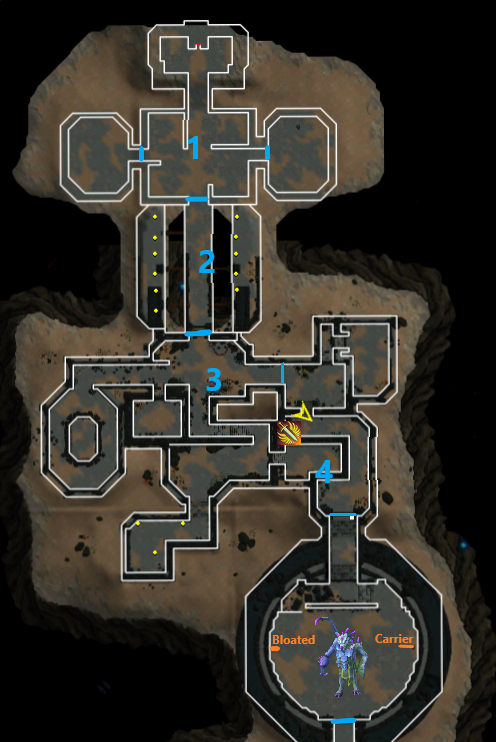
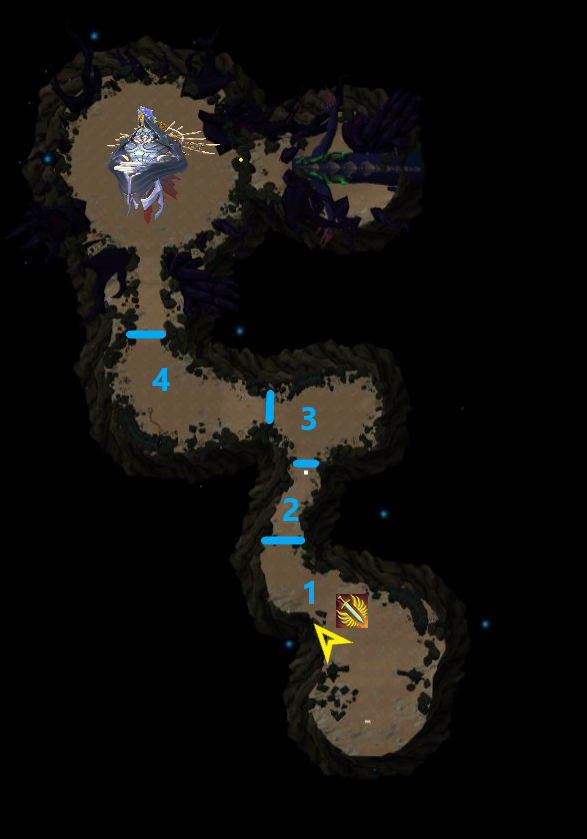
First Floor - Pre Crassian
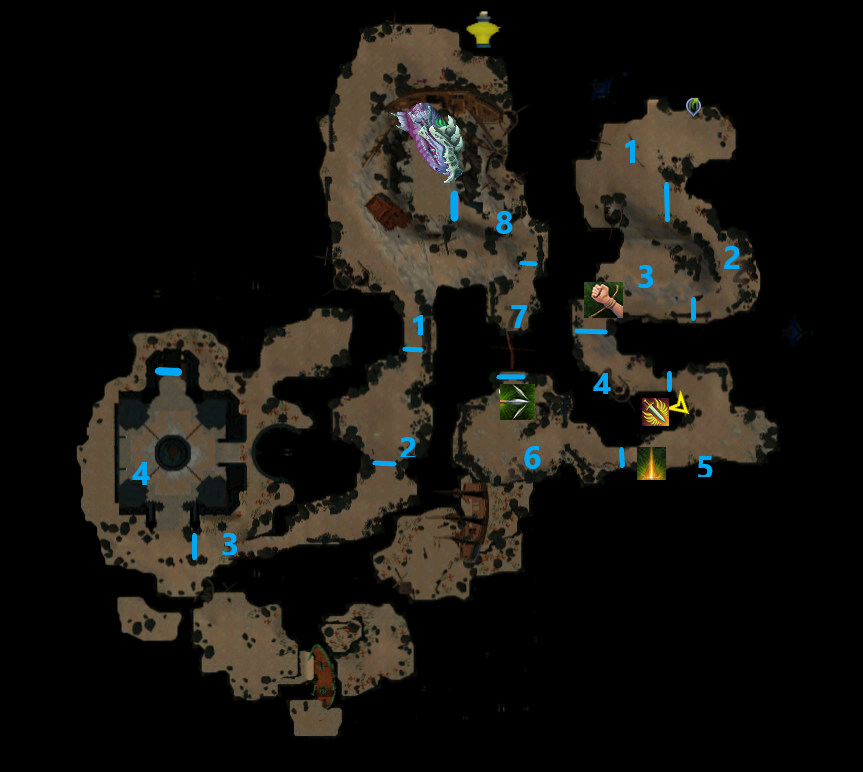
Room 1
⬥ Attack the closest Crassian scout and wait until both scouts are stacked. For the sake of consistency Dark Bow 
 the Scouts into good abilities for the Crabs.
• You can attempt to stack Crabs + Crassians, but its very inconsistent.
Room 2
⬥ Bladed Dive → Surge → Dark Bow / Snap Shot  for the Scouts → strong abilities for the Crabs.
• Don't use Tight Bindings  or Binding Shot for this room.
Room 3
⬥ Wait a tick, Chin Tight Bindings the middle Scout closest to the gate, into Dark Bow , cleaning up as seen fit.
Room 4
⬥ Burst the two Zealots with anything at your disposal. You can immediately use a Powerburst of Acceleration  to reset your Bladed Dive if its on cooldown.
How to cut the corner for the next section:
Room 5
⬥ Target a Zealot with Corruption Shot  and move back to the spot shown below, this will stack the 2 Zealots + 1 Scout together.
• You can activate as you move back. Keep it on for all enemies.
⬥ Swap out to a stronger weapon for the single Scout remaining to finish it off.
Room 6
⬥ Put on your Salve Amulet and target as seen fit.
• Luring is intuitive here as their position is completely random.
Room 7
⬥ Surge and target the closest Zombie into Incendiary Shot . Wait for it to detonate then  .
.
Room 8
⬥ Manage your adrenaline to be at least 100% for Death's Swiftness  and don't pray any Deflects or Soul Split
  .
.
• Alternatively, with an Eldritch Crossbow in your Essence of Finality , you can Split Soul here with Chins  →
→  .
.
• This will put you in positive adrenaline under Incendiary buff
Entry to the room
Entry to Crassian
The Crassian Leviathan
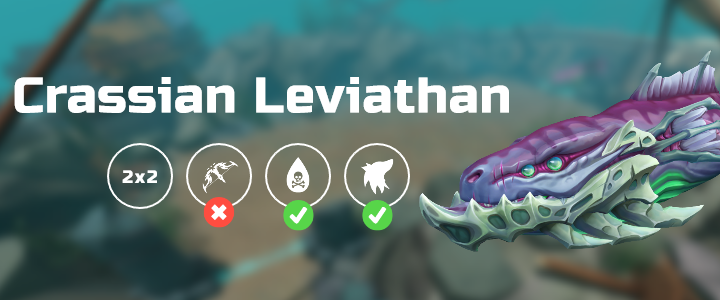
As the first boss of The Shadow Reef, The Crassian Leviathan has a very small and easy set of area denial mechanics that can deal a lot of damage if ignored. The boss heals passively over the duration of the fight, greatly reduced by having Weapon Poison active.
Mechanics
⬥ Poisonous Breath - This will always be the first mechanic of the fight and is signalled by the Leviathan firing a stationary breath attack in front of it, dealing rapid heavy typeless damage and contaminating the arena. Never stand in the centre nor in front of the Leviathan.
• The Poison Pit poisons and stuns the player if stood upon.
⬥ Many Heads - The Leviathan has additional heads that will stun and poison you in the contaminated zones if you are near them.
⬥ Head Sweep - The Leviathan will slam its head across the ground twice, dealing very heavy damage to anyone caught in the area, avoided by moving to the opposite side of where the sweep begins.
⬥ Tactical Retreat - After going through one Dragon Breath and two sets of Head Sweeps, the Leviathan will move to other opposite side of the arena, repeating his previous rotation.
• Bladed Dive + Surge back to his main head once this happens to prevent getting stunned.
Strategy
Defensive + Surge → Bladed Dive → Death's Swiftness (roughly at the middle of his head) +  + Vulnerability Bomb
  + Dreadnip → Split Soul → → improvise
Your primary objective is to fit in 2 Rapid Fire's  , 2 Snap Shot's , 4 Greater Ricochet's , 2 Corruption Shot's , and a varying number of Dark Bow's depending on your adrenaline.
Note: Any bleed used will be considered walked as he moves to the opposite side of the arena, use this to your advantage if you're getting 2 cycles.
Post-Crassian - Second Floor Entry
Room 1
⬥ Acceleration Pot and Bladed Dive + Surge your way to the Zealot and Crabs.
• 1 cycling Crassian will allow you to have an extra Bladed Dive + Surge in case of messing up.
⬥ Stay at melee distance of the Zealot and kill all the relevant mobs.
Note: Crabs hit for up to 3K each.
Room 2
⬥ Equip Salve Amulet into good abilities.
• Luring is intuitive as their positions are completely random.
Room 3
⬥ Kill the Necromancer and the Huge Skeleton with a Rapid Fire or Dark Bow , saving 80% adrenaline for the next room if Rapid Fire was used .
• Expect frame drops on the way to the cliff.
Room 4
⬥ Dark Bow or Rapid Fire to kill the Necromancer.
⬥ Activate your Undead Sigil  and Shadow Tendrils with Chins , cleaning up as seen fit.
Note: There will be a massive frame drop afterwards, spam click your compass when entering the second floor, into Surge + Bladed Dive the center of the room.
Second Floor Entry - Taraket's Entry
Room 1 (Artefacts)
⬥ Equip your and
• Kill the Necromancer to the West and interact with the guarded artefact.
• Kill the Necromancer to the East and interact with the guarded artefact.
Note: When interacting with the artefacts, you're left unable to act until the animation is finished. Equipping your Bladed Dive (or using it to get there) before you activate them is ideal.
Room 2 (Bridge)
⬥ Target the Necromancer with a stalled Corruption Shot + Vulnerability Bomb release with a 9sq weapon from this square move back → Bombardment  then back in to stack the Horrors and the Necromancer for a . Afterwards you have two options:
• The safe clear is being at a distance from the horrors, cleaning up as seen fit.
• Surge melee distance → Western Horror with → Eastern Horror with Chins , cleaning up as seen fit.
⬥ Save at least 58.5% adrenaline for the next room.
Positioning
Room 3
⬥ Auto → will usually insta-kill them.
Room 4
⬥ Bladed Dive and Surge as demonstrated to avoid aggro from the Sotapanna's.
⬥ Apply Incendiary Shot and wait for detonation before clearing the mobs.
⬥ Once in position, use Demoralize  on a Necromancer to stack all relevant mobs together.
• The gate opens when the 2 Necromancers, and 2 Huge Skeletons are killed.
It's easier to triple Bladed Dive for this line instead, it'll just be slightly slower as demonstrated below.
Faster form
Triple BD - Easier form
Note: Judge accordingly if you need (or want) to do a full clear to get adrenaline and / or bank comfortably, with enough speed the Zombie(s) and / or Sotapanna(s) will not reach you in time.
Taraket the Necromancer
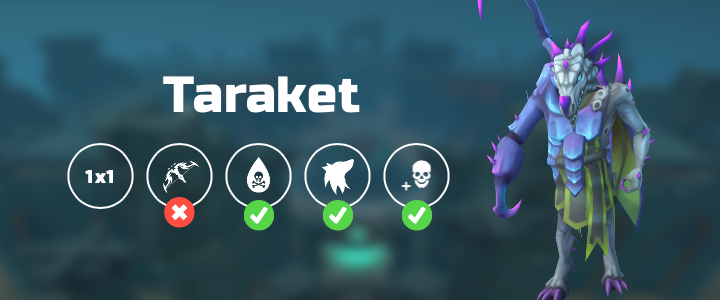
This encounter is the second boss of the Shadow Reef, and is a clear step up in difficulty from the first. Taraket, Corpses and Skeletons are classified as Undead for Salve Amulet , Undead Slayer perk  and sigil purposes.
Mechanics
⬥ Rift of Undeath - This Rift with 30k HP will spawn a large amount of skeletons that each deal low amounts of damage.
• If left alive, the Rift will detonate for up to 9,000 hard typeless damage.
⬥ Death's Swiftness - Taraket will shroud himself in a Death's Swiftness, becoming immobile and switching attack styles from Mage to Ranged. These autos are slightly stronger than his Magic ones.
⬥ Corpse Carrier and Bloated Monstrosity - Upon reaching 200K hitpoints, Taraket will become invulnerable and fly towards one of the two black crystals at the sides of the arena, healing himself and spawning one of the two corpses: Corpse Carrier (west) or the Bloated Monstrosity (east), with 90K HP each.
• The Corpse Carrier will continuously spawn skeletal mobs until its death.
• The Bloated Monstrosity increases the damage of Taraket's auto-attacks.
⬩ Both of these attack with melee and are very easy to kite if needed.
• Taraket can only spawn these once each and will not heal upon hitting 200K HP afterwards.
• The first spawn will always be the closest crystal to Taraket.
⬥ Spirit Wall - Taraket smashes the ground in front of him for heavy melee damage, summoning a line of spirits in front of him that will move towards the player, dealing rapid typeless damage upon contact.
• Move out of the way as needed be.
⬥ Absorb Undead - Periodically, Taraket may absorb all skeletons in the arena to heal 2,000 per skeleton.
Strategy
The use of Chins gives Ranged an unique distinction for rapid, yet somewhat safe kills at Taraket. It is paramount you properly flick Soul Split and keep a good amount of damage up to sustain yourself through both corpses. Remember to equip your Salve Amulet after using your Essence of Finalities  .
.
⬥ Opener
• 
 → → → → → → →
  → Improvise
• GRico on the portal with Hydrix to recover adrenaline if needed be.
⬩ Blocking his path to the Carrier crystal makes the kill faster, at a significant cost of safety. Doing this will require you to Bladed Dive right next to Taraket upon reaching phase HP.
⬩ If you achieved a Portal Skip, save GRico for the Corpse Carrier and his skeletons.
⬩ The Carrier can be flanked with your first ability by using Target Cycle.
⬥ Corpse Carrier:
• If you have time (via a Portal Skip) on the Corpse Carrier until Taraket is vulnerable again.
⬩ Stand on the spot that Taraket will land to avoid using Rout / Demoralize on him.
• Lure them so they can be 'd together while camping Soul Split .
⬩ The Carrier can be flanked with your first ability by using Target Cycle.
⬩ Rout / Demoralize Taraket to move him next to the Portal you didn't stand on the previously mentioned spot.
⬩ If you have an Eldritch Crossbow in your Essence of Finality , you may Split Soul here with Chins .
• Rush to 200K HP as fast as possible.
⬩ The remaining skeletons will be finished off with as the fight progresses.
⬥ Bloated Monstrosity:
→ Basics → → → → → → → → → → improvise
• Stay melee distance of him at all times. See video examples for the movement guide.
• Cancel if survival is at stake.
Taraket Exit - Second Floor Exit
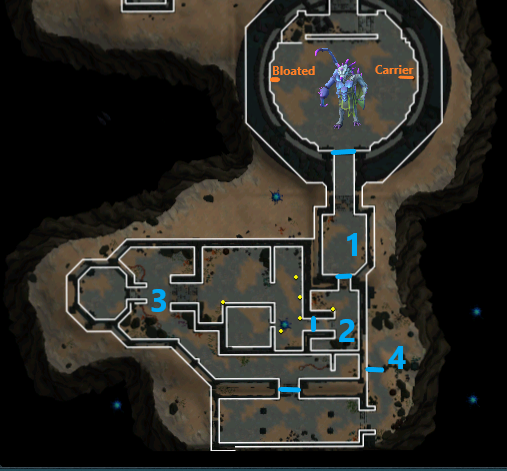
Room 1
⬥ Equip your Salve Amulet → Surge into the Undead Witch.
⬥ Activate your Sigil (if possible), throw a Vulnerability Bomb into strong abilities, saving 58.5% adrenaline for the next room.
• You can flick Soul Split for the Witch' attacks, as her windup animation is really slow.
Room 2
⬥  the Kalgerion Demon into → improvise.
• An active slayer task will help a lot here.
⬥ Bladed Dive + Surge sideways from the stairs to the next section as shown below.
Room 3
⬥ Kill the Necromancers as you move past them with anything available.
• If possible, attempt to ECB and kill both in one Split Soul.
Room 4
⬥ Kill the Necromancers with anything available, holding 58.5% adrenaline for the next floor.
• If possible, attempt to ECB and kill both in one Split Soul.
• Equip your Bladed Dive just before you jump.
Third Floor Entry - Pre-Ambassador
Room 1
⬥ Surge + Bladed Dive to the gate.
⬥ Gauge when will it be appropriate to Dark Bow as their positions are largely random.
• A Chin SGB can be used here for a surprisingly decent amount of spread out damage.
• If you have an Eldritch Crossbow in your Essence of Finality , you may attempt to Split Soul here with Chins
Room 2
⬥ Try to stack both Skeletons, using Salve Amulet and Undead Slayer into strong abilities for the clear.
• Equip a stronger weapon if they're too far apart from each other.
• If you have an Eldritch Crossbow in your Essence of Finality , you may attempt to Split Soul here with Chins
Room 3
⬥ Immediately Dark Bow the middle Zealot and clean up afterwards.
• If you have an Eldritch Crossbow in your Essence of Finality , you may Split Soul here with Chins
⬩ Alternatively, attempt to Chincend all mobs for an instant clear!
• Zealots may aggro independently of one another, ruining the lure. You can fix it by dragging all Zealots and walking back to the gate you came from.
⬩ Skeletons ought to be killed first, and at the same time as you are luring the Zealots.
⬥ Try to stack all mobs if possible., using Salve Amulet and to prioritise the Skeleton's death.
Room 4
⬥ Hug the West wall to reduce the chance of the minibosses aggro'ing you, should they aggro alternate Anticipation  and Freedom
  .
.
⬥ Activate Incendiary Shot and , wait for detonation before clearing the room.
• Don't worry too much if the mini-bosses attack you, simply bind them / teleport out quickly after the gate is open to bank comfortably.
• A faster but slightly riskier way to get there is through this Surge + Bladed Dive as shown below:
⬥ Attempt to stack all four mobs together, clear as seen fit while keeping 100% adrenaline for the entry to Kranon, the Ambassador.
Note: Remember to rebind your Brews  from your Guthix Rests
  from your action bar if applicable.
Kranon, the Ambassador

At the bottom of the abyssal section awaits Kranon, the Ambassador, the final boss of the Elite Dungeon 3. This boss has a moderate learning curve compared to most solo bosses and has a variety of mechanics ranging from DPS checks, area denial, self-healing, and the usage multiple combat styles.
The boss primarily attacks with ranged  , with a heavy mage attack
  after every 5 autos. The mage hit is replaced by a small but instant melee swipe
  if the player is in melee distance.
Ambassador's Attack Rotation
⬥ 1M to 550k
• Mage / Melee auto → 5 autos → Black Stone Flames → 5 autos → Unstable Black Hole → 5 autos → Black Stone Flames → 5 autos → TriBeam + Sinister Fragments → Pulse of Erebus + 5 autos → Repeat
Magic Bomb
Melee Swipe
⬥ 550k - 400k
• Crassian Ritual Keepers are summoned.
• Tribeam, Sinister Fragments and Pulse of Erebus are no longer part of the attack rotation going forward.
⬥ Seiryu's Intervention - Death
• 5 autos → Melee / Magic Bomb → 5 autos → Melee / Magic Bomb → Shadow Onslaught
1M-550K HP
⬥ Black Stone Flames
• The Ambassador fires a spout into the player, dealing no damage and placing a bar over their head.
• When this bar nears depletion, a 5x5 area around the player will become corrupted until Seiryu clears them at the Ritual phase.
• This is similar to the Sanctum Guardian's mechanic from ED1 but will create two areas instead, separated by 2 ticks.
⬩ These zones will last until the final phase of the fight and will ramp up to 2000 typeless damage to anyone standing inside.
⬥ Unstable Black Hole
• The Ambassador will spawn an unstable black hole near the area that is despawned by stunning it.
• If not stunned, the Black Hole will detonate for a hard typeless of up to 9,000.
⬥ Tribeam & Sinister Fragments
• Six fragments will disperse from the boss to the edges of the arena with 20K HP each. At the same time, the Ambassador will fire three slowly rotating beams that last for about a minute.
• The beams always spawn in set locations (N, SE, SW), and rotate counterclockwise slowly.
⬩ The entry gate is located East of the arena.
• He'll use the Fragments every full attack rotation or by hitting the 650K cap until the next phase commences.
Tribeam Unleashed
• Failing to destroy a fragment(s) prompts the Ambassador to absorb them, and release a Pulse of Erebus per absorption, dealing 8,000 soft typeless damage.
550K-400K HP
⬥ Tribeam, Sinister Fragments and Pulse of Erebusa are no longer used.
⬥ The Ambassador spawns invulnerable Crassian Ritual Keepers that deal low ranged damage, making Resonance  harder to use.
400K-0 HP
⬥ Black Stone Flames and Unstable Black Holes are no longer used.
⬥ Seiryu intervenes shortly after, healing you to full.
Seiryu's Intervention
⬥ A circle of black hands will spawn to encompass the edge of the arena.
• The hands will slam down in a clockwise fashion, sending constant dark magic towards the Ambassador.
⬩ The first outburst of dark magic is unblockable.
⬩ An unblocked projectile will heal the Ambassador for 2500HP.
⬩ Standing between the Ambassador and the projectiles will make them black, damaging you for a small typeless hit but will not heal the Ambassador.
⬥ Shadow Onslaught
• Every 10 auto attacks, the Ambassador will send out 5 extremely hard hitting Magic attacks.
Strategy
⬥ 1M-650k
Note: All Unstable Black Holes will be cleared with Rout / Demoralize .
• Activate Disruption Shield  , Vengeance
  and equip Ruby bolts .
 → → → → → → improvise → Rout the Unstable Black Hole.
• Due to the great variance of adrenaline with the usage of critical hits and bolts , this rotation can be tweaked if needed be.
• Flanking can be used by standing directly underneath him, or by standing South when he summons the Black Hands.
⬥ Tribeam
• Activate Disruption Shield and Vengeance as soon as possible.
• only once at the start.
• At the 6th Fragment you will build to this rotation: Natural Instinct  → Basics → Incendiary Shot → Basics → Greater Ricochet → Basics Defensives / Bleeds → Death's Swiftness → More Basics.
⬩ The cue to start this setup is roughly at 46s from Spinner start. Any further increases the risk of having to rely on Hydrix bolt and Relentless procs for the setup.
⬥ After Tribeam
• With Split Soul active at all times, your priority is to spam Dark Bow's as much as possible, saving Vitality Potion for the Ritual.
⬩ This rotation is RNG-reliant and demands improvisation if your procs / crits fall short.
• Use at least one Seren Godbow spec .
• With a good damage output, your Death's Swiftness will be on cooldown as ritual starts. Adapt accordingly with a Split Soul shortly before the Ritual begins.
⬥ Ritual
Note: Not necessarily the start of the ritual, but rather when your Death's Swiftness is finally off-cooldown.
→ → → → → → improvise
If you're going to get a second Mage Onslaught don't use Vitality + , save it for Reflect  + Vitality
Example Run
https://youtu.be/t2bsgrHq2Wk 13:35 (pre Greater Ricochet nerf)
https://youtu.be/6-reMr_nwUY 12:50