⚠️ Disclaimer
Some methods in this guide may not work after the combat beta changes in March 2026
Know of a newer method/rotation? Got a video? Share it in #vod-and-rotation-megadump-2-electric-boogaloo!
The Shadow Reef
Introduction
This is a hybrid guide which assumes a strong underlying knowledge of all mechanics and information presented in #ED3 Basic Guide.
General Notes
⬥  undead slayer task works on many of the mob but is not required or needed for GM timer.
⬥ This can be done on  or
or  . will be better for the mob clearing.
⬥ It's recommended to set your anti-spam delay for your  to 1 via the Lectern at Anachronia.
⬥ You can Surge or Bladed Dive  a tick before each gate unlocks to save a tick on every entry.
⬥  Luck of the Dwarves will not improve unique drop rates.
⬥ 4TAA usage is highly encouraged as the AoE hitbox of barrage spells 
 helps greatly with mob clears.
⬥ This guide will be focused around cycling  and
and  .
.
⬥ The Crassian Leviathan, Taraket the Necromancer and Kranon, the Ambassador rotations are examples. Improvisation is required to work around crit rng, wand resets, and phase timings.
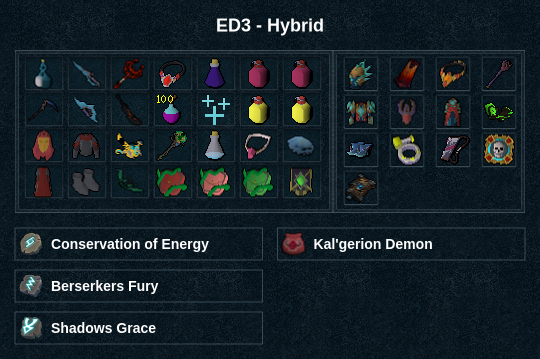
Presets and Relics
⬥ Magic
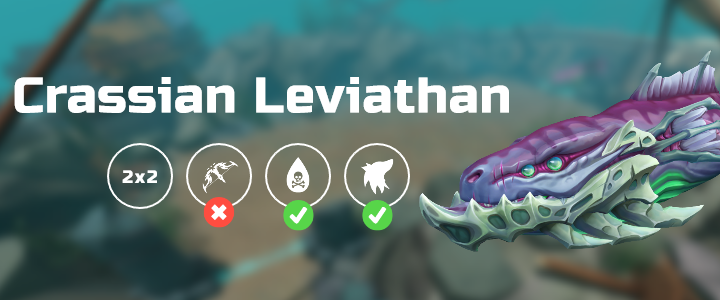
The Crassian Leviathan
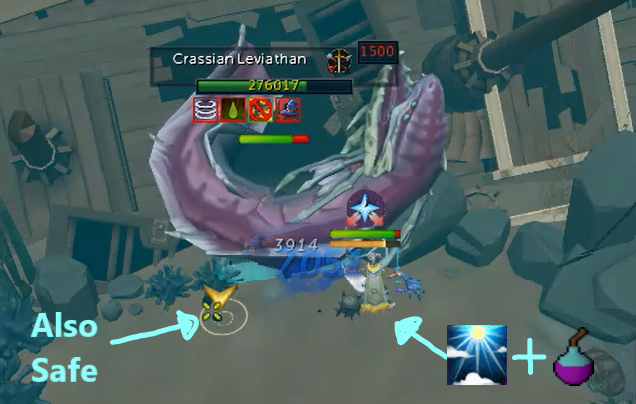
The Crassian Leviathan has good defence so 
 early in sun rotation if not on
⬥ Aim to  right away either directly in front of the Leviathan's nose or on the same tile you throw
  to (directly east of the Leviathan's head). Both spots allow for you to safely hit the boss in while avoiding the Head Sweep special.
Example rotation
(tc) + +  →
→  +
+  →
→  →
→  +
+  →
→  →
→ 
 → → →
→ → →  →
→  → →
→ →  →
→  → →
→ →  → →
→ →
Notes:
⬥ Time your channelled abilities (  ) between head sweeps to avoid having to cut them short to move for head sweeps.
• Use non-channelled abilities when you are walking to dodge sweeps ( )
• Semi-random sweep timings makes it such that you may need to improvise your rotations to a great extent.
• Try to early and end with high adren for the next section of the dungeon.
Taraket the Necromancer
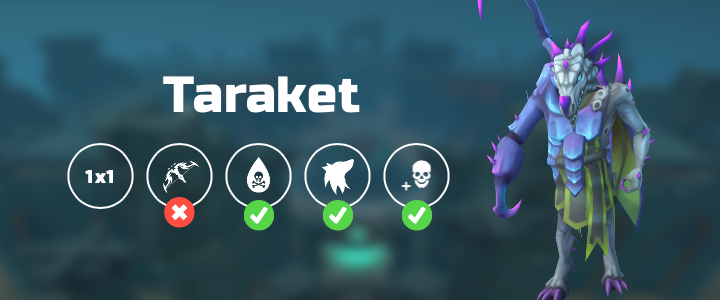
Taraket, Corpses and Skeletons are classified as Undead for  ,
,  and
and  purposes. Generally you ignore the Corpse Carrier and the Bloated Monstrosity.
Strats
⬥ Melee → Mage → Melee
• Time gated by ezk to a 1:02. Consistently 1:02-1:10
• Zerked on last phase can be spicy.
• Dont need undead for 2nd zerk
⬥ Melee → Mage → Mage
• No cooldown issues so potential for faster kills.
• Magic on last phase so less K.O. potential.
Melee → Magic → Melee (Example rotation)
P1
 + + →
+ + →  →
→  →
→  → 4t → 7t
  →
→  →
→  →
→ 
P2
→ (if high adren  ) → build to → When attackable → →
P3
Build to + → → → →  → → → →
  → →
→ →  →
→
Notes:
⬥ Can and build on the Bloated Monstrosity to kill it to minimize K.O. potential
⬥ Rotation will vary based on adren and if On/Off task
Melee → Mage → Mage (Example Rotation)
P1
+ + → + → → →  →
→  →
→
P2
Build adren →  → → →
→ → →
P3
Build adren + build to  → → → →
  →
→  → → → → → → → →
Note: will vary based on phase timing and crit rng
Kranon, the Ambassador

The boss primarily attacks with  , with a
  after every 5 autos. The mage hit is replaced by a small but instant
  swipe if the player is in melee distance.
Phase 1 (Example rotation)
pre →  +
+  md of the boss → + → → → () → → → → → 3t → → → → → → → →
Note: Your goal is to get Ambi to below 650k in a rotation and apply 
Phase 2 - Spinners (Example rotation)
⬥ Spinner 1
pre  → (tc) + + →
⬥ Spinner 2
→ + →
⬥ Spinner 3
→  → ( if needed)
⬥ Spinner 4
→  →
→  → improv
⬥ Spinner 5
 → → → → improv
⬥ Spinner 6
→ 
 → → → improv
P3
(tc ambassador) → + → →  cancel with on 5 stacks.
(Example rotation)
→ → → → → → → → → → → → → →
Note: aim for 3-4 should typically do ~550k damage
P4 (<100k)
→ → → improv
P4 (100k>)
→ → → → → → → → improv with threshold/basics
P3 Alternative: Non- Non- rotation
⬥ Spinner 5
→
⬥ Spinner 6
→ → →
P3
(tc) + → → build to → → → → → → → → build with good basic for
→ → → → → → → → → → → → improvise to death
Notes:
⬥ Slightly less damage
⬥ Don't need to bring / 
Mobs
⬥ See magic camp guide [here] for other ideas for clearing the dungeon.
⬥ Rotations below are more of suggestions to give an idea of AoE opportunities and ability prioritisation at different parts of the dungeon. If you find yourself needing more abilities to clear mobs due factors such as the lack of adren or unlucky hits it is expected
• Target cycling and using basics is a good way to check and finish off leftover mobs as sometimes their bodies take awhile to disappear after dying.
Pre-Crassian
+ diagonally from entrance to start the dungeon and walk to lure the mobs together.
2 Scuttlers 2 Scouts
→ target Scout → . → (tc) + + diagonally then to the next scouts. Beware of  activating here and killing your primary target.
2 Scuttlers 3 Scouts
Stand md of middle scout. →  → + to next mobs
Note generally have to wait for Scuttlers to move closer.
3 Warriors 2 Scouts
(tc) + → → + → finish with basic →
2 Zealots
Target 1st zealots → target 2nd zealots 3t + +
+ the corner
2 Zealots 2 Scouts
Target a Zealot and → → target 2nd zealot and build adren.
to Zombies after.
note: if is cool down instead and finish with basics.
6 Zombies
Equip (tc) + → → (if on cooldown then  )
)
6 Zombies
→ (tc) + → (tc) → + → finish with basics.
4 Zombies 1 Armoured zombie
+ (tc) + → Target Armoured zombie → → → finish with basics. to 2 zealots
2 Zealots
Target Zealot and charge into 3t + + → → and build to 100. into Crassian.
Post-crassian to pre taraket
After Crassian,  until the next barrier.
⬥ not needed for timer.
⬥ → → → target scout + →
1 Zealot 4 Scuttlers
Target Zealots → → → + into the middle of Zombies.
8 Zombies
on yourself and + → Target high hp →  → finish with basics → → →
1 Necromancer 2 Huge Skeletons
Target Necromancer → →
1 Necromancer
While running past, + → or →
3 Armoured Zombies
Target the middle zombie and → + → . Go through door and + to middle of the next room.
2 Necromancers
one Necromancer and + the other. Proceed to bridge and  + .
+ .
1 Necromancer 2 Sea Horrors [Bridge of Death]
Target Necromancer → → Target a Sea Horror 3/5tick → finish 2nd with basics if needed.
3 Sotapannas
Target the middle Sotapanna → walked → . Diagonally + and proceed to the barrier before Taraket.
2 Necromancers 2 Huge Skeletons
Target a Necromancer → →  → basics + for adren if needed
Post-Taraket to pre-Ambassador
→ towards Sea Witch after finishing Taraket.
1 Sea Witch 2 Armoured Zombies
Group the mobs together while targeting the Sea Witch and + → + →
1 Kalgerion Demon
Clear the demon with  + → while moving to the barrier.
1 Necromancer
+ → while running towards next Necromancer.
1 Necromancer
→ and + to the next Necromancer.
1 Necromancer
→ → while running to the next Necromancer.
1 Necromancer
→ 3/5t → + to jump spot.
5 Warriors 1 Scuttler
then diagonally to lure warriors and scuttler. → (tc) + → → → finish with magic basics
2 Warped Skeletons
+ a skeleton, then the other → or depending on adren to Zealots.
3 Zealots + 2 Warped Skeletons
Target a Warped Skeleton walking → → Target higher hp Warped skeleton → → → finish with thresholds and strong basics.
2 Warped Skeletons + 2 Scouts
Wait for skeletons to walk over while , then target skeleton and → → . Build to 100% and + into instance.