Dragonkin Laboratory (Necromancy)
General Notes
⬥ It's recommended to set your anti-spam delay for your  to 1 via the Lectern at Anachronia
⬥ You can or  a tick before each gate unlocks to save a tick on every entry
⬥  will not improve the number of energies dropped, nor the drop rate for any codex
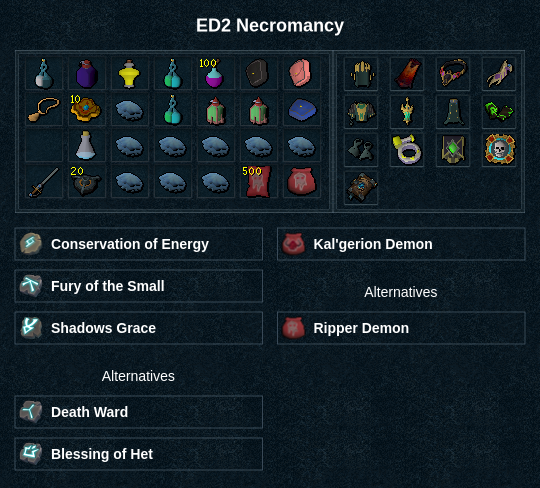
Presets and Relics
⬥ IMPORTANT: Have  on armour, or use
⬥  is an optional swap when summoning conjures
• Camp  otherwise.
⬥ 
 are optional as a familiar swap if going for flightskip at
• Summon after killing black hands.
Pre-Astellarn
4 Laboratory Slimes
→  →
→  → + down stairs (west) → (tc)
  → (tc) east slime +
  →
→  →
→  +
+  →
→  →
→
3 Red Dragons
south → target middle dragon 
 →
→ 
 → target south dragon →
  → target north dragon →
  →
→  →
→  → up stairs + to gate
4 Red Dragons
south +  → target middle dragon → →
  → target far dragon → → → → → target any remaining dragons
4 Lava Golems
to end of bridge + → → → →  →
→
2 Laboratory Slimes 1 Celestial Dragon
+ + to dragon/gate → + 2x  → → (tc) slime → →
  → (tc) →
3 Celestial Dragons
+ to far west →  → → →
→ → →
1 Celestial Dragon
+ → → → → → →
1 Celestial Dragon
→ → → → → →
Astellarn, the First Celestial
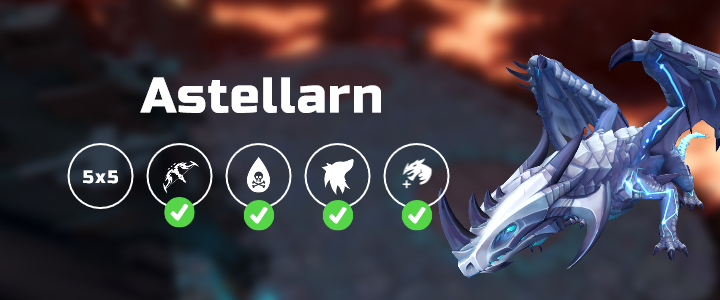
Example Rotation
Note: walk out of black wyrmhole where required
→ +  → → (phased) → → → → → → target pulsar → → → → (tc) boss →
  +
+  → →
→ →  → (Can if high HP)
Post-Astellarn to pre-Verak Lith
2 Celestial Dragons
+ → → → → → → →
2 Lava Strykewyrms
+ + diagonally across room to wyrms → (tc) → → → → → →
Note: use  after they die to get to the next gate.
4 Black Dragons
+ + + to black dragons → (tc) rear dragon + 2x + → → → → (tc) + → → → →
6 Black Dragons
into the middle of the 4 dragon cluster → → → → → + to 2 dragons → → → → northern dragon (make sure that they stack) → highest hp dragon → → →
4 Lava Strykewyrms
→ + → →  → (tc) → (tc) → → → → → → → → (tc) → →
4 Black Dragons
→ run to middle of room + (tc) dragon + → → → → → run to final dragon → (tc) → → → → → →
Verak Lith

Example Rotation
Note: tank bombs during fight to avoid dps loss
+ to Verak Lith
→  + (shouldn't cost adrenaline without a target) → → (tc) + → → → → → + 2x → → → → → (tc) pillar + + → → (tc) → → → → → → + → → →
  + → → → → finish as required
Post-fight
→ + across bridge → chest (load last preset → teleport) → option 4
Post-Verak Lith to pre-Black Stone Dragons
3 Dragonstone dragons 1 Onyx dragon
+ → + → to the 4 + across bridge to middle of far cluster → (tc) → → → → → (tc) highest hp dragon → → → →
2 Dragonstone dragons
+ up stairs + into attack range → (tc) dragon next to gate → → → → → → → →
1 Hydrix dragon
+ + → (tc) 2nd hydrix + → → → → → + + to steps
2 Dragonstone dragons
Note: aim to finish room on 90%+ adren with 6+ Necrosis stacks
 + up steps → (tc) dragonstone dragon on opposite side to the boss gate + → → (move from spikes) → → (tc) → → → → → →
Black Stone Dragon
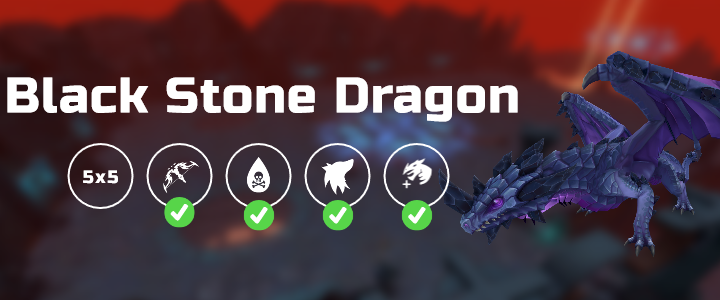
Rotation
Note: this is a flight-skip rotation
Phase 1 (opening rotation)
+ → (tc) + + → → → → → → →
Phase 2 (hands)
2x → → → → → → move to new hand
→ → → → → move to new hand
→ → → → → move to new hand
→ → → (target boss)  → (target hand) → → → → → →
  → → → → → → + → (if less than 5 souls) or to kill the hand
Phase 3 (flight-skip)
(Optional):  + Dismiss
  + Summon + Fill it with
→ → / → → → → + → → → → → → → → → →
Phase 4/5
If the flight skip is not obtained, build Necrosis stacks  , Residual Souls
  and Adrenaline on the boss while it lands and kill it after its final flight.
Example Runs
Full Run with Flight Skip - https://youtu.be/BLXZs5nVgZA?si=H0dBx-28GZiJGxie - 9:21
Full Run with Flight Skip - https://youtu.be/iUjm5Lka_rY?si=vy7SgQesDMXVsmuk - 9:30