⚠️ Disclaimer
Some methods in this guide may not work after the combat beta changes in March 2026
Know of a newer method/rotation? Got a video? Share it in #vod-and-rotation-megadump-2-electric-boogaloo!
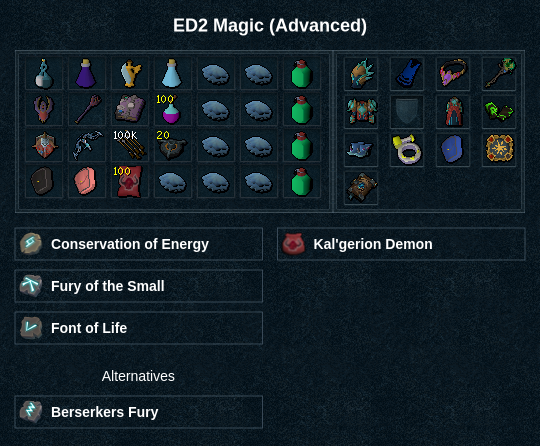
Dragonkin Laboratory (Magic Advanced)
General Notes
⬥ It's recommended to set your anti-spam delay for your  to 1 via the Lectern at Anachronia
⬥ You can or  a tick before each gate unlocks to save a tick on every entry
⬥  Luck of the Dwarves will not improve the number of energies dropped, nor the drop rate for any codex
⬥  and
and  can be juggled continuously through the run to maximise dps but master speed runs can be attained purely camping
⬥ When using  defensive 2H autos are assumed, as per #Magic DPM Advice
⬥ The AoE centre of large mobs such as the dragons is the south-west tile - this is important when choosing which dragon to 
⬥ Celestial dragons should be stunned to prevent healing either using auto  or stuns such as
⬥ For a detailed description of each mob in the dungeon, please reference #ed2-basic
⬥ You should be using a dragon cluster slayer task to maximise DPS
⬥ Due to RNG, you may find that there are low-health stragglers, even if rotations are followed precisely - simply finish these with strong fillers (gconc/dbreath/wm)
⬥  should be camped except for
  (use dual-wield) and (which sometimes requires
  , as called out in rotations)
Presets and Relics
⬥ Magic
Pre-Astellarn
4 Laboratory Slimes
 → down stairs (west) → tc
  → (tc) far-east slime +
  → → ()
  →
→ 
3 Red Dragons
+ south/west (stand at bottom of stairs hugging the east wall to lure and place your sun) → target south Red Dragon +  →
→  + →
+ →  →
→  → target northern dragon + →
  → → → → → up stairs + to gate
⬥ location:

4 Red Dragons
south → target middle dragon + walk north-west back into your  → +
→ +  → → target north dragon + → → target west dragon + auto → target dragon by gate + + to gate
Note: do not stand behind the pillar when using  as your line of sight will be blocked and one of them will not be hit.
4 Lava Golems
to end of bridge + the middle golem → →  (3t)→ → clear 2 golems nearest gate with / autos
2 Laboratory Slimes 1 Celestial Dragon
+ to dragon/gate → walk to corner + (tc) dragon + → + floor in between dragon and slimes → → →  → (tc) rear slime + → →
3 Celestial Dragons
to far west + + → (tc) south dragon + →  → autocast + → → → (tc) north dragon + → (tc) middle dragon + →
1 Celestial Dragon
diagonally across stairs + south + (tc) dragon next to gate + → walk back into + →  →
→
1 Celestial Dragon
+ (tc) closest dragon → + autocast → → → → →
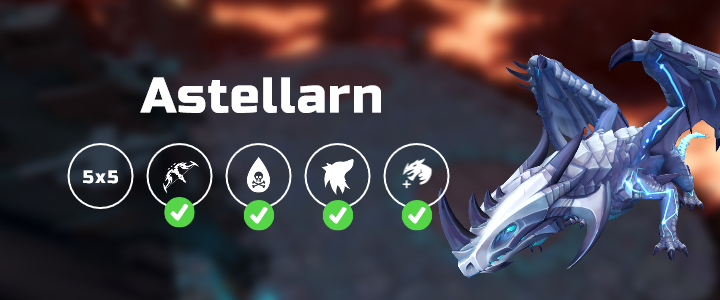
Astellarn, the First Celestial
Example Rotation
Note: walk out of black wyrmhole where required
 +
+  → → + →
  +
+  +
+  +
+  + →
+ →  +
+  + → → → → → (tc) pulsar + → → →
  → → → + → + → → → fillers
Post-Astellarn to pre-Verak Lith
2 Celestial Dragons
( still active) + into room → autocast + → → in between dragons → (tc) middle dragon + → (tc) front dragon + → (tc) middle dragon + run to gate + → → run down stairs
2 Lava Strykewyrms
+ diagonally across room to wyrms → (tc) auto → (3t) →  + autocast → → s + → fillers
Note: use  after they die to get to the next gate.
4 Black Dragons
+ + to black dragons → (tc) rear dragon + → → near to gate + (tc) rear dragon → → → → s + → → → →
6 Black Dragons
+ to opposite side of dragon cluster → → → walk in middle of cluster/2 dragons by gate + → (tc) gate dragon + → → → (tc) opposite side dragon + + → → → (tc) gate dragon + → → →
4 Lava Strykewyrms
+ → + (tc) middle wyrm + → + → in middle + (tc) wyrm closest to gate → → → (tc) wyrm with highest LP + → (tc) wyrm with highest LP + →
4 Black Dragons
run to middle of room + (tc) dragon + → (3t) → → (tc) rear dragon + → → run towards gate + (tc) gate dragon + → → (tc) rear dragon + → → → → fillers
Verak Lith

Example Rotation
Note: tank bombs during fight to avoid dps loss
+ → + to Verak
→ + → + + + + → + + → → →  (x2 on same tick) → + auto → → → autocast + → (tc) spire + → → (tc) boss + auto →
  +
+
→ → → → → → → + → →  +
+  → → → → → (tc) spire + → → + + + → + + autocast + → →
  → auto → → → → → →
Post-fight
+ across bridge → chest (teleport) → option 4
Post-Verak Lith to pre-Black Stone Dragons
3 Dragonstone dragons 1 Onyx dragon
+ → to the 4 + across bridge to middle of far cluster → (tc) closest + → (tc) middle dragonstone + → + autocast → → → middle of cluster → (tc) rear dragon + → (tc) side dragon + + →  → auto + → → → →
2 Dragonstone dragons
up stairs + into attack range → (tc) dragon next to gate + → → → (3t) → → → + run to gate → →
1 Hydrix dragon
+ → (tc) 2nd hydrix + → + (x2 on same tick) + walk dragon into them → → → →  → + to steps
Note: if off cooldown, use + to reach the final gate.
2 Dragonstone dragons
Note: aim to finish room on 100% adren with 6+ stacks and 5+ stacks
up steps → (tc) dragonstone dragon on opposite side to the boss gate + → → → (3t)→ → autocast + → → → → → →
Black Stone Dragon
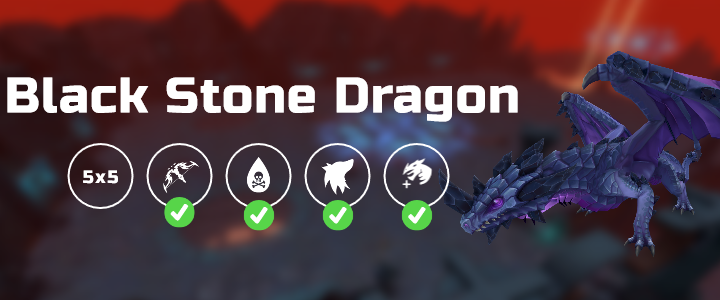
Rotation
Note: this is not a flight-skip rotation, and puts  at sub-200k LP before flight
Phase 1 (opening rotation)
autocast + + + + → + → → + → → camp + + → → →  + →
+ →
Phase 2 (hands)
 + ground by hand 1 → (tc) hand 1 + → → → + → (tc) hand 2 + → → → to middle of hand 2 & 3 → + → → (tc) hand 3 + + → + → → → → → → + autocast → (tc) hand 4 + + run over hand and deploy (x2 on same tick) → + → walk to spot for next phase + →
Phase 3 (pre-flight)
→ (if any hands left, fillers to clear) → (tc) → + autocast → → → → + → + → → → → → → → + + + → + + → → → →
Phase 4 (during flight)
Build to 100% adren then 
Ensure has applied
On last 2-3 flights, use → → build adren
Phase 5 (post-flight)
→ → → → → → → → → → + + +
Example Runs
All example runs are done off task.
⬥ After FSOA nerf
• https://www.youtube.com/watch?v=dIMnCcHdn_4 11:58
⬥ Before FSOA nerf
• https://www.youtube.com/watch?v=xef5Zv9kClI 13:40 [No FSOA ]
• https://youtu.be/dyg74ucD5nc 12:45
• https://www.youtube.com/watch?v=-v4IuE4lj1A 10:19 [Flightskip]