AFK Helwyr

Disclaimer
⬥ IF YOU CANNOT GET A METHOD TO WORK DO NOT MESSAGE THE CREATOR(S)
• It is more than likely user error or cutting corners, use #pvm-help if you cannot get it to work.
Positioning
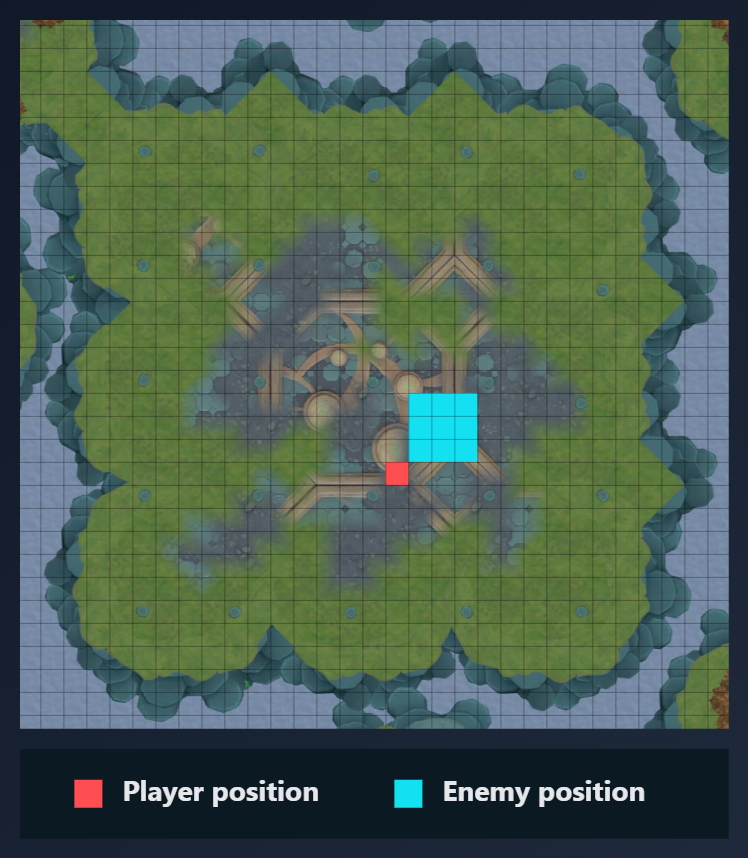 ⬥ Stand 1 tile north-east of the mushroom directly south of the center mushroom.
Melee AFK Method (55+ kph) 
Overview
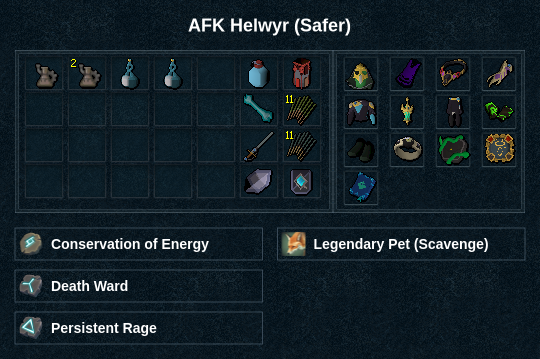
Presets and Relics
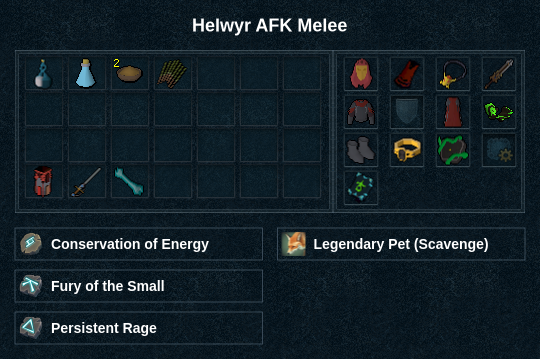
Ability Bar

Example Kills
Magic AFK Method (55+ kph) 
Overview
 ⬥
⬥  ⬥
⬥  ⬥
⬥  ⬥
⬥  ⬥
⬥ 
Presets and Relics
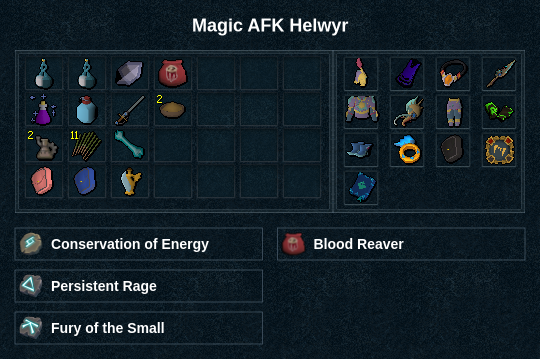
Ability Bar

Example Kills
Ranged AFK Method (55+ kph) 
Overview
 ⬥
⬥  ⬥
⬥  ⬥
⬥  • Used to heal
  ⬥
⬥ 
⬥ With back-to-back-to-back mushroom clouds there is a risk of death without using  on cooldown.
Presets and Relics
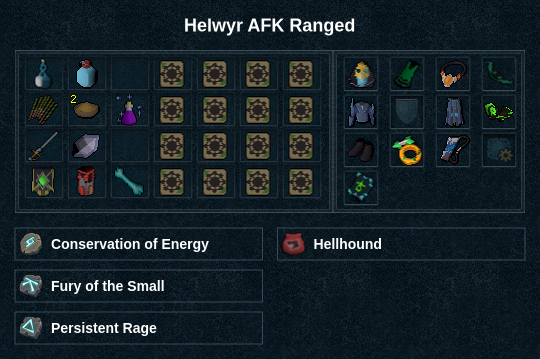
Ability Bar

Example Kills
Necromancy AFK Method (53+ kph) 
Overview

 ⬥ Tiers 3-4
•
⬥ Tiers 3-4
•  •
• 
 ⬥ Tier 7
•
⬥ Tier 7
•  Customised to conjure all spirits
⬥ Tier 3-6
• All upgrades of
Customised to conjure all spirits
⬥ Tier 3-6
• All upgrades of 


 or
or  ⬥
⬥  or
or  ⬥
⬥  ⬥
⬥  ⬥
⬥ 
 ⬥
⬥  ⬥ Pray
  and
and  ⬥ May be less consistent without
⬥ With back-to-back-to-back mushroom clouds there is a risk of death without using on cooldown.
⬥ Use Crystal Shield  4 and Absorbative
  4 on the legs for best results.
Presets and Relics
Ability Bar

Example Kills